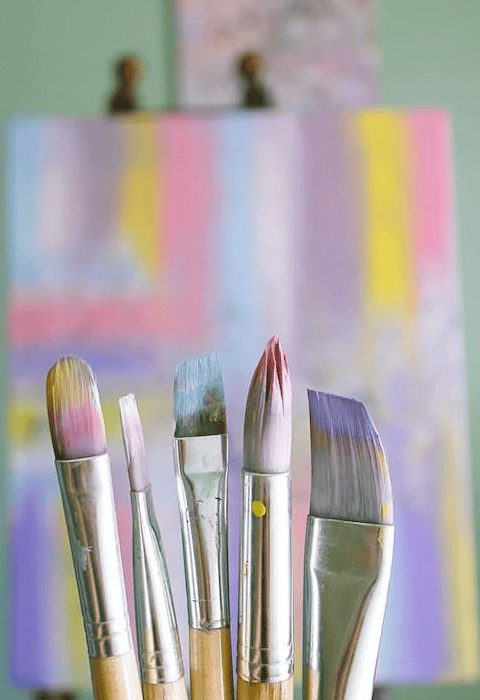
As a dedicated DIY enthusiast, painting becomes a routine part of your life. And if you’re anything like me, you understand the significance of knowing how to clean paint brushes that have dried up due to the occasional forgetfulness.
Whether it’s adding a fresh coat to rejuvenate your living room, bathroom, or kitchen, or embarking on an exciting new project like constructing a wooden birdhouse, tool shed, or furniture piece, painting is a constant endeavor. It’s rare for a substantial stretch of time to pass by without a new canvas awaiting your brushstrokes.
Painting can quickly turn into a frustrating task when your brushes dry out. The immediate response is often to rush to the hardware store and buy new brushes. However, constantly replacing brushes can lead to significant long-term expenses.
The good news is that there are several affordable and straightforward methods to clean and revive hardened paint brushes. In fact, most of these cleaning techniques require common household items. Let’s explore a few of these methods below, so you can restore your brushes without breaking the bank.
Mastering the Art of Cleaning Dried Paint Brushes
Regularly utilizing paint brushes without proper cleaning and storage post-project can lead to unfortunate drying. If your paint brushes have fallen victim to this fate, fret not! Below, we unveil effective methods to rescue and restore your brushes, bringing them back to life.
Utilizing Fabric Softener
Before diving into this method, it’s important to note that it works best for water-based paints, such as latex and acrylic. Now, let’s explore how fabric softener, known for its fluffy wonders on clothes and sheets, can also be a game-changer in restoring dried-out paint brushes. You’ll only need a small amount of fabric softener (around 1/8 cup) for this technique.
To begin, mix the fabric softener with 4 cups of warm water in a bucket, adjusting the ratio if needed for larger brushes or rollers. Once your fabric softener solution is ready, the cleaning process is simple:
Submerge the dried fabric softener mixture and gently swirl it around until you observe the paint starting to loosen and sink to the bottom of the bucket;
Once the paint brush appears clean, rinse it under running water in the sink to remove any remaining fabric softener solution;
Thoroughly wipe the paint brush with a paper towel to remove excess moisture and residual paint;
Place the brush flat on a horizontal surface to dry. Avoid drying it upright, as this could lead to water seeping into the handle and causing damage.
For optimal brush maintenance, we recommend employing this fabric softener method after every painting project. The more frequently you utilize this technique, the better your paint brushes will perform and endure over time.
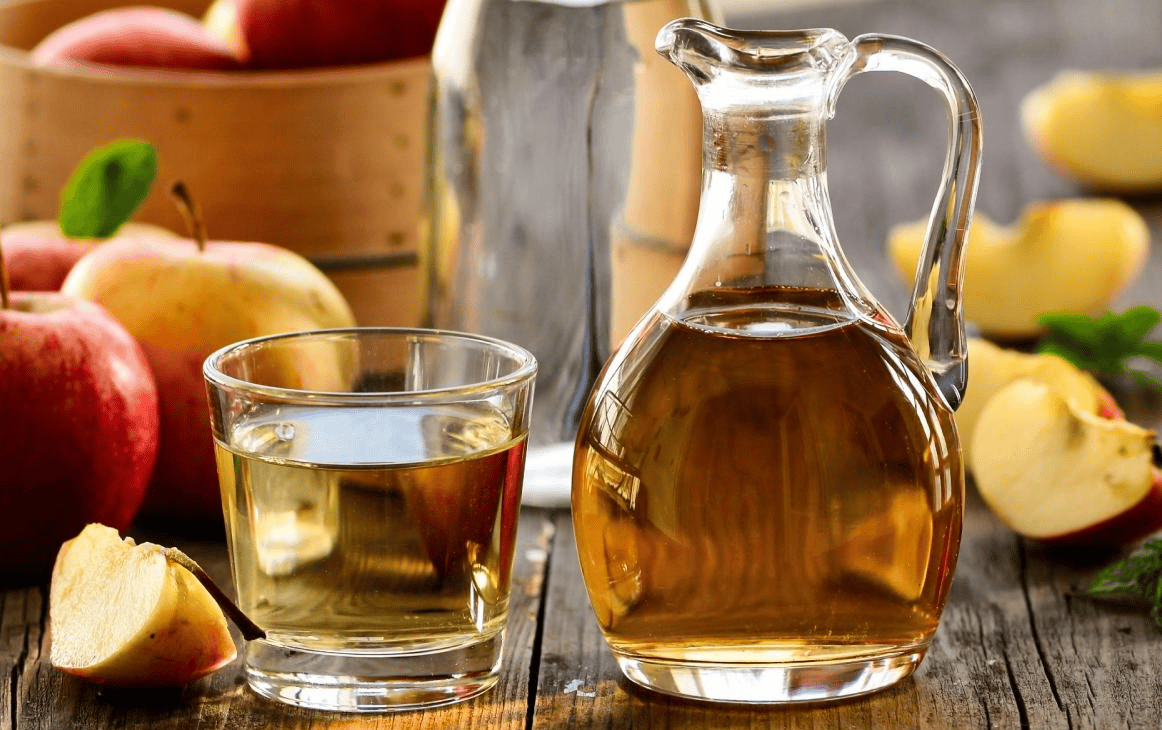
Harnessing the Power of Vinegar: Resurrecting Dried Paint Brushes
When it comes to cost-effective solutions, both apple cider vinegar and white vinegar have proven their efficacy in cleaning dried paint brushes. However, it’s important to note that the pungent scent of vinegar might not be appealing to everyone, and this method can be time-consuming.
If you don’t mind the odor and are willing to invest more time in the cleaning process, the vinegar method is worth considering. Just like the fabric softener technique, the vinegar method works best with water-based paints. Before using vinegar, it needs to be boiled over an open flame. Below, I’ll outline the process for both apple cider and white vinegar.
Here’s how to use white vinegar to restore your dried-out paint brushes:
Boil white vinegar in a pot;
Immerse your dried-out paint brush in the white vinegar solution;
Allow the brushes to soak in the solution for approximately 20 minutes;
Wash the brushes with soap and warm water, using your hands to gently remove the hardened paint;
Rinse the brushes thoroughly in the sink to remove any remaining residue;
Place the brushes on a flat surface horizontally to dry completely.
Unlocking the Potential of Solvents: Restoring Dried Paint Brushes
The solvent method is widely preferred for cleaning dried paint brushes due to its effectiveness and speed. The only obstacle that might hinder its usage is the availability of solvents at hand.
If you don’t have any solvents on hand, a quick trip to your nearest grocery or box store (or online purchase) will suffice. It’s worth noting that solvents can be more expensive compared to other cleaning solutions mentioned in this list, such as fabric softeners.
The beauty of the solvent method is that it’s not limited to restoring brushes affected by water-based paints alone; it also works wonders for cleaning brushes with oil-based paints. However, it’s crucial to select the appropriate solvent, such as mineral spirits or turpentine, specifically for oil-based paint cleaning.
Here’s a step-by-step breakdown of the process for using solvents to clean your dried-out brushes:
Begin by manually removing any excess paint from the brush, gently using your fingers;
Pour a small amount of solvent into a non-food container;
Submerge the brush into the solvent, swirling it around until all the dried-out paint has been loosened and removed;
Use your fingers or another suitable tool to reshape the bristles of the brush, ensuring they are in their proper form;
Store the brush horizontally, allowing it to dry completely.
Discover the Power of Rubbing Alcohol: Salvaging Dried Paint Brushes
Among the available options, using rubbing alcohol stands as the least favored due to the additional step it requires. As rubbing alcohol tends to dry out paint brushes, a follow-up with a moisturizing soap bar is necessary after cleaning.
However, if you seek a swift and cost-effective method to clean your brushes, this might be the approach for you. Simply dip your dried-out brushes in a small amount of rubbing alcohol, and voila! You have a straightforward cleaning solution at your disposal (excluding the mentioned extra step).
Conclusion
When confronted with dried-out paint brushes, we highly recommend experimenting with the methods provided above to determine the most effective one for your situation. Don’t forget that the key to preventing brush drying is as simple as washing them diligently with soap and water after every use.
Although this routine may appear laborious, it guarantees that your brush bristles remain supple and agile, thereby prolonging their lifespan and yielding long-term savings. Embrace the maintenance process, and witness the transformation of your brushes into reliable tools for countless artistic endeavors.
FAQS
Can a dried paintbrush be saved?
Yes, a dried paintbrush can often be saved from dried paint. Soaking the brush in warm soapy water can help soften the paint, followed by gently combing the bristles to remove the loosened paint. Another option is using a solvent like mineral spirits or paint thinner for oil-based paints. With proper cleaning and care, a dried paintbrush can be restored to its original functionality, allowing you to continue using it for future painting projects.
Can you clean a paintbrush after it dries?
It is possible to clean a paintbrush after it dries. Depending on the type of paint used, you can employ various techniques such as soaking the brush in warm soapy water or using solvents like mineral spirits or paint thinner. By loosening and removing the dried paint, you can restore the brush’s bristles and ensure its usability for future painting projects. Regular cleaning and proper maintenance of paintbrushes can help prolong their lifespan and maintain their effectiveness.
Will paint thinner clean a dried paintbrush?
Paint thinner can be effective in cleaning a dried paintbrush, especially if the paint used is oil-based. To clean a dried paintbrush with paint thinner, soak the bristles in a container with the paint thinner for some time. Then, use a brush comb or your fingers to remove the softened paint from the bristles. Rinse the brush with water and soap to remove any remaining paint thinner residue. However, it’s important to follow safety precautions and proper ventilation when working with paint thinner due to its strong odor and flammability.
How do you clean dry paintbrushes without paint thinner?
If you prefer to clean dry paintbrushes without using paint thinner, there are alternative methods available. For water-based paints, soaking the brush in warm soapy water can help loosen and remove the dried paint. Gently comb the bristles with your fingers or a brush comb to further remove the paint residue. For stubborn paint, you can also try using a mixture of vinegar and warm water or a specialized brush cleaner. Regularly rinse the brush and repeat the process until the bristles are clean. Remember to reshape the bristles and let the brush dry flat before storing it for future use.
Art appraisers play a vital role within the art industry, offering their expert assessments on the value, authenticity, and condition of artworks. Whether you are an art enthusiast, a practicing artist, or an individual seeking to sell or insure an artwork, it is imperative to locate a reputable and skilled art appraiser. This article aims to provide you with guidance on finding an art appraiser and shed light on essential factors to consider during your search.
What is an Art Appraiser?
Art appraisers are highly knowledgeable professionals who possess extensive expertise in evaluating the value and authenticity of artworks. They employ diverse methods and techniques to ascertain the fair market value of a particular piece, taking into account crucial factors such as the artist’s stature, provenance, condition, and prevailing market trends. The evaluation conducted by an art appraiser holds significant importance for insurance purposes, estate planning, philanthropic donations, art transactions, and other related matters.
Why is an Art Appraiser Important?
The expertise of an art appraiser is essential for several reasons:
Valuation
Art appraisers play a vital role in providing accurate and impartial assessments of an artwork’s value, taking into account various factors that impact its worth. These factors encompass:
Historical Significance: Art appraisers thoroughly examine the artwork’s historical context and its significance within broader art movements or periods. They consider how the piece contributes to the artist’s overall body of work and its influence on the art world as a whole;
Artistic Merit: Evaluating the quality and artistic merit of the artwork is crucial. Appraisers assess the craftsmanship, technique, and artistic skill demonstrated by the artist. They carefully analyze elements such as composition, color palette, and the overall aesthetic appeal of the piece;
Condition: The physical condition of the artwork significantly affects its value. Appraisers meticulously inspect the artwork for any damage, deterioration, or indications of restoration. The better the condition, the higher the potential value of the artwork;
Provenance: Provenance refers to the documented ownership history of the artwork. Appraisers delve into the lineage of the piece, tracing its ownership back to the artist or its initial appearance in the art market. Provenance helps establish authenticity and adds value to the artwork;
Market Demand: Appraisers analyze current market trends and the demand for similar artworks. They review recent sales data, auction records, and fluctuations in the market. Factors such as the artist’s popularity, collector interest, and the overall climate of the art market influence the value of the artwork.
Insurance
Insurance companies heavily rely on professional art appraisals to accurately determine coverage and premiums for insuring valuable artworks. During the appraisal process, several crucial aspects come into play:
Value Assessment: Appraisers meticulously evaluate the artwork to determine its current market value. They consider various factors such as the artist’s reputation, provenance, historical significance, and overall condition of the piece;
Risk Evaluation: Appraisers also assess the associated risk of insuring the artwork. Factors taken into account include the artwork’s susceptibility to damage or theft, its display location, and any existing security measures in place;
Documentation: Appraisers provide comprehensive documentation that supports their valuation. This documentation includes a detailed description of the artwork, high-quality photographs, and relevant supporting documents such as certificates of authenticity or provenance records;
Expertise and Credentials: Insurance companies seek professional appraisers who possess expertise in the art market and hold appropriate credentials. They look for individuals with extensive knowledge of art history, valuation methodologies, and current market trends.
Sale and Acquisition
When it comes to buying or selling artwork, the evaluation conducted by an appraiser plays a vital role in ensuring fair transactions and informed decision-making. Here’s how appraisers contribute to the process:
Determining Fair Market Value: Appraisers provide an unbiased assessment of the artwork’s fair market value. They consider various factors, including the artist’s reputation, the artwork’s condition, its provenance, and recent sales data. This evaluation helps establish a reasonable and objective price for the artwork;
Assistance in Price Negotiations: Appraisers offer valuable support during price negotiations. Leveraging their expertise and knowledge of the art market, they provide insights into the artwork’s value and current market trends. This guidance enables buyers and sellers to negotiate with confidence and arrive at a fair price;
Enabling Informed Decision-Making: An appraiser’s evaluation equips buyers and sellers with critical information necessary for making informed decisions. Sellers can accurately determine the appropriate asking price based on the artwork’s value, while buyers can assess whether the price aligns with the artwork’s worth. Appraisers also identify any potential risks or concerns associated with the artwork, empowering clients to make decisions based on reliable information;
Conducting Due Diligence: Appraisers conduct thorough research and analysis as part of their evaluation process. They verify the authenticity of the artwork, review its ownership history, and assess its overall condition. This comprehensive due diligence ensures that buyers and sellers have accurate and trustworthy information about the artwork, reducing the risk of fraudulent transactions or misrepresentation;
Bringing Professional Expertise: Appraisers bring specialized knowledge and expertise to the sale and acquisition process. They possess a deep understanding of art history, valuation methodologies, and the current art market. This expertise allows them to provide valuable insights and advice to clients, facilitating successful and well-informed transactions.
Estate Planning
Estate planning involves various aspects, and art appraisals play a significant role in this process, particularly in inheritance tax calculations and the equitable distribution of assets. Here’s how appraisers contribute to estate planning:
Asset Valuation: Appraisers determine the value of art assets within an estate by carefully assessing each artwork’s fair market value. They consider factors such as the artist’s reputation, provenance, condition, and market demand to provide an accurate valuation;
Inheritance Tax: Art appraisals are crucial for calculating inheritance taxes. Tax authorities require a comprehensive valuation of art assets to determine the tax liability. Appraisers’ evaluations serve as crucial evidence of the artworks’ worth, ensuring precise and fair tax calculations in adherence to applicable laws and regulations;
Equitable Distribution: Appraisals assist in the equitable distribution of art assets among beneficiaries. Estate planners and executors rely on the appraiser’s valuation to determine the fair division of artworks or create a plan that takes into account the preferences of the beneficiaries. This ensures a balanced and fair distribution of art assets;
Documentation and Record Keeping: Appraisers provide detailed documentation of their evaluations, including comprehensive descriptions, high-quality photographs, and valuation reports. These records serve as essential evidence in estate planning and help maintain accurate documentation for future reference;
Expertise in Estate and Tax Regulations: Appraisers possess specialized knowledge of estate and tax regulations pertaining to art assets. They stay up-to-date with changes in laws and guidelines to provide accurate appraisals that comply with legal requirements and ensure proper handling of art assets within estate planning.
Authenticity
Art appraisers play a crucial role in verifying the authenticity of artworks and detecting any forgeries or reproductions. Here’s how they contribute to ensuring authenticity:
Art Historical Knowledge: Appraisers possess extensive knowledge of art history, including the styles, techniques, and materials used by various artists and art movements. This knowledge enables them to assess the authenticity of artworks based on their alignment with the artist’s known body of work;
Provenance Research: Appraisers conduct thorough research on the artwork’s provenance, which involves tracing its ownership history and associated documentation. They examine historical records, exhibition catalogs, and sales records to establish a documented chain of ownership that can verify the artwork’s authenticity;
Technical Analysis: Appraisers may employ various technical methods to analyze the artwork in question. They study the materials used, examine the brushwork or other techniques employed, and sometimes utilize scientific analyses such as infrared imaging or pigment analysis. These technical analyses provide additional evidence to support the authenticity assessment;
Collaboration with Experts: Appraisers often collaborate with a network of experts, including art historians, conservators, and scientists, to validate the authenticity of artworks. By leveraging the expertise of these specialists, appraisers can gather additional insights and opinions to support their authenticity evaluations;
Familiarity with Forgeries: Appraisers stay informed about known forgeries or reproductions associated with specific artists or periods. They study past cases and reference materials to familiarize themselves with telltale signs of fraudulent works. This knowledge helps them identify any red flags or inconsistencies that may indicate the presence of a forgery.
Factors to Consider When Finding an Art Appraiser
When searching for an art appraiser, consider the following factors to ensure you find the right professional for your specific needs:
Experience and Qualifications
When seeking art appraisers, consider the following criteria to ensure you find the most qualified professionals:
Specialization: Seek appraisers with expertise in the type of artwork you want to appraise, whether it’s contemporary art, classical paintings, sculptures, or other mediums;
Education: Look for appraisers who possess formal education in art history, appraisal studies, or a related field. A strong educational background equips them with the necessary knowledge to accurately assess the authenticity, condition, historical context, and value of the artwork;
Certifications: Consider appraisers who hold certifications from recognized appraisal organizations such as the International Society of Appraisers (ISA) or the Appraisers Association of America (AAA). These certifications indicate a higher level of expertise and adherence to professional standards;
Professional Affiliations: Check if the appraiser is a member of professional art appraisal associations or societies such as the American Society of Appraisers (ASA) or the Royal Institution of Chartered Surveyors (RICS). Membership in reputable organizations demonstrates their commitment to upholding ethical standards and staying updated with industry trends.
Specialization
When searching for an appraiser to evaluate your artwork or collection, consider the following points regarding specialization:
Art Periods: Some appraisers focus their expertise on specific art periods, such as Renaissance, Impressionism, or Contemporary Art. If you possess artwork from a particular period, it is beneficial to find an appraiser who specializes in that era;
Mediums: Different mediums, such as paintings, sculptures, photography, or ceramics, require unique skill sets and knowledge for an accurate appraisal. Look for appraisers who have specialized experience in assessing the specific medium of your artwork;
Types of Artwork: Appraisers may specialize in certain types of artwork, such as prints, textiles, tribal art, or decorative art. If your collection primarily consists of a specific type, finding an appraiser who specializes in that area can offer a deeper understanding of its historical, cultural, and market significance.
Reputation and Reviews
When considering art appraisers, it’s essential to assess their reputation and credibility. Here are some steps you can take to ensure you select a reputable appraiser:
Research Background: Conduct thorough research on the appraiser’s background, including their education, professional experience, and affiliations with reputable organizations. Look for information that highlights their expertise, track record, and commitment to maintaining ethical standards in the field of art appraisal;
Testimonials and References: Seek testimonials or references from previous clients who have worked with the appraiser. These firsthand accounts can provide valuable insights into the quality of their services, professionalism, and accuracy of their appraisals;
Online Platforms: Utilize online platforms to gather information about the appraiser’s reputation. Websites like Google Reviews, Yelp, or specialized art-related platforms allow individuals to provide feedback and ratings based on their interactions with the appraiser;
Professional Networks: Engage with art communities, forums, or online groups to seek recommendations or opinions about reputable appraisers. These networks often have knowledgeable members who can provide valuable insights or personal experiences with different appraisers.
Appraisal Methods
When engaging an art appraiser, it’s crucial to inquire about the methods they employ for the appraisal process. Here are some key considerations regarding appraisal methods:
Recognized Methods: Reliable appraisers adhere to recognized and accepted methods that comply with industry standards. These methods ensure transparency, consistency, and accuracy in the valuation process;
Comparative Sales Analysis: One commonly used method is comparative sales analysis. Appraisers examine recent sales of comparable artworks to determine a fair market value for the piece being appraised. This method relies on researching and analyzing sales data of similar artworks in terms of artist, style, medium, condition, and provenance;
Research-Based Valuation: Appraisers often conduct extensive research on the artwork to assess its historical significance, cultural context, provenance, and condition. They may delve into art historical references, auction records, exhibition history, and literature related to the artist or artwork;
Consultation with Experts: Appraisers may consult with experts specializing in the specific field or subject matter of the artwork under evaluation. These experts can provide additional insights, expertise, and opinions that contribute to a well-rounded appraisal.
Confidentiality and Ethics
Ensure that the appraiser adheres to strict confidentiality and ethical standards. Art appraisers should prioritize the privacy and security of their clients’ information and maintain objectivity and impartiality in their evaluations.
Researching Art Appraisers
To begin your search for an art appraiser, consider the following research avenues:
Online Directories and Databases
Several online directories and databases specialize in listing art appraisers. Websites like the American Society of Appraisers (ASA), the Appraisers Association of America, or the ISA provide search functionalities to find appraisers based on location, specialization, or certification.
Art Organizations and Associations
Art organizations and associations often maintain directories of their members, including certified appraisers. Examples include the Art Dealers Association of America (ADAA), the American Society of Appraisers, and the Appraisers Association of America.
Local Galleries and Museums
Reach out to local galleries, museums, or art institutions in your area. They can often provide recommendations or refer you to reliable appraisers they have worked with in the past.
Recommendations and Referrals
Ask for recommendations from art collectors, artists, or individuals who have previously engaged art appraisers. Personal referrals can be valuable as they are based on first-hand experiences.
Internet Search
Conduct a targeted internet search using relevant keywords and your location to find appraisers near you. Explore websites, portfolios, and online reviews to gather information about potential appraisers.
Evaluating Art Appraisers
Once you have compiled a list of potential art appraisers, it’s essential to evaluate them thoroughly before making your final choice. Consider the following steps:
Initial Contact and Communication
Initiate contact with the appraisers on your list and assess their responsiveness, professionalism, and willingness to answer your initial questions. Prompt and clear communication is indicative of a reliable appraiser.
Portfolio and Sample Appraisals
Request to see examples of the appraiser’s previous work, including sample appraisals. This allows you to assess the quality and depth of their evaluations and determine if their style aligns with your expectations.
Interviewing Appraisers
Set up interviews or consultations with the appraisers who passed your initial evaluation. Use this opportunity to ask specific questions about their experience, qualifications, appraisal methods, and approach to ensure they meet your requirements.
Fee Structure and Cost Estimates
Discuss the appraiser’s fee structure and obtain a clear understanding of their charges. Art appraisal fees are typically based on factors such as the complexity of the artwork, the time involved, and the purpose of the appraisal. Ask for an estimated cost and evaluate it in relation to your budget.
Making the Right Choice
After conducting thorough research and evaluations, it’s time to make your choice. Consider the following aspects:
Criteria
Comparing Appraisers
Qualifications
Review notes, portfolios, and communications with each appraiser to assess their qualifications and expertise.
Expertise
Evaluate the appraisers’ expertise in relation to your specific needs and requirements.
Fit for specific needs
Determine which appraiser best aligns with your specific needs and offers the highest level of professionalism.
Trust and comfort
Trust your instincts and choose an appraiser with whom you feel comfortable and confident.
Communication
Consider the appraiser’s ability to engage in open and transparent communication throughout the appraisal process.
Working relationship
Ensure that you can establish a positive working relationship with the chosen appraiser.
Agreements and contracts
Before proceeding with the appraisal, obtain a written agreement or contract that clearly outlines the appraisal’s scope, time frame, fees, and the responsibilities of both parties.
Terms and conditions
Gain a clear understanding of the terms and conditions associated with the appraisal.
Conclusion
Finding an art appraiser may seem daunting, but with proper research and evaluation, you can locate a qualified professional who meets your specific needs. Consider their experience, specialization, reputation, and appraisal methods. Take advantage of online directories, recommendations, and interviews to make an informed decision. By following these guidelines, you can ensure a reliable and accurate appraisal of your valuable artwork.
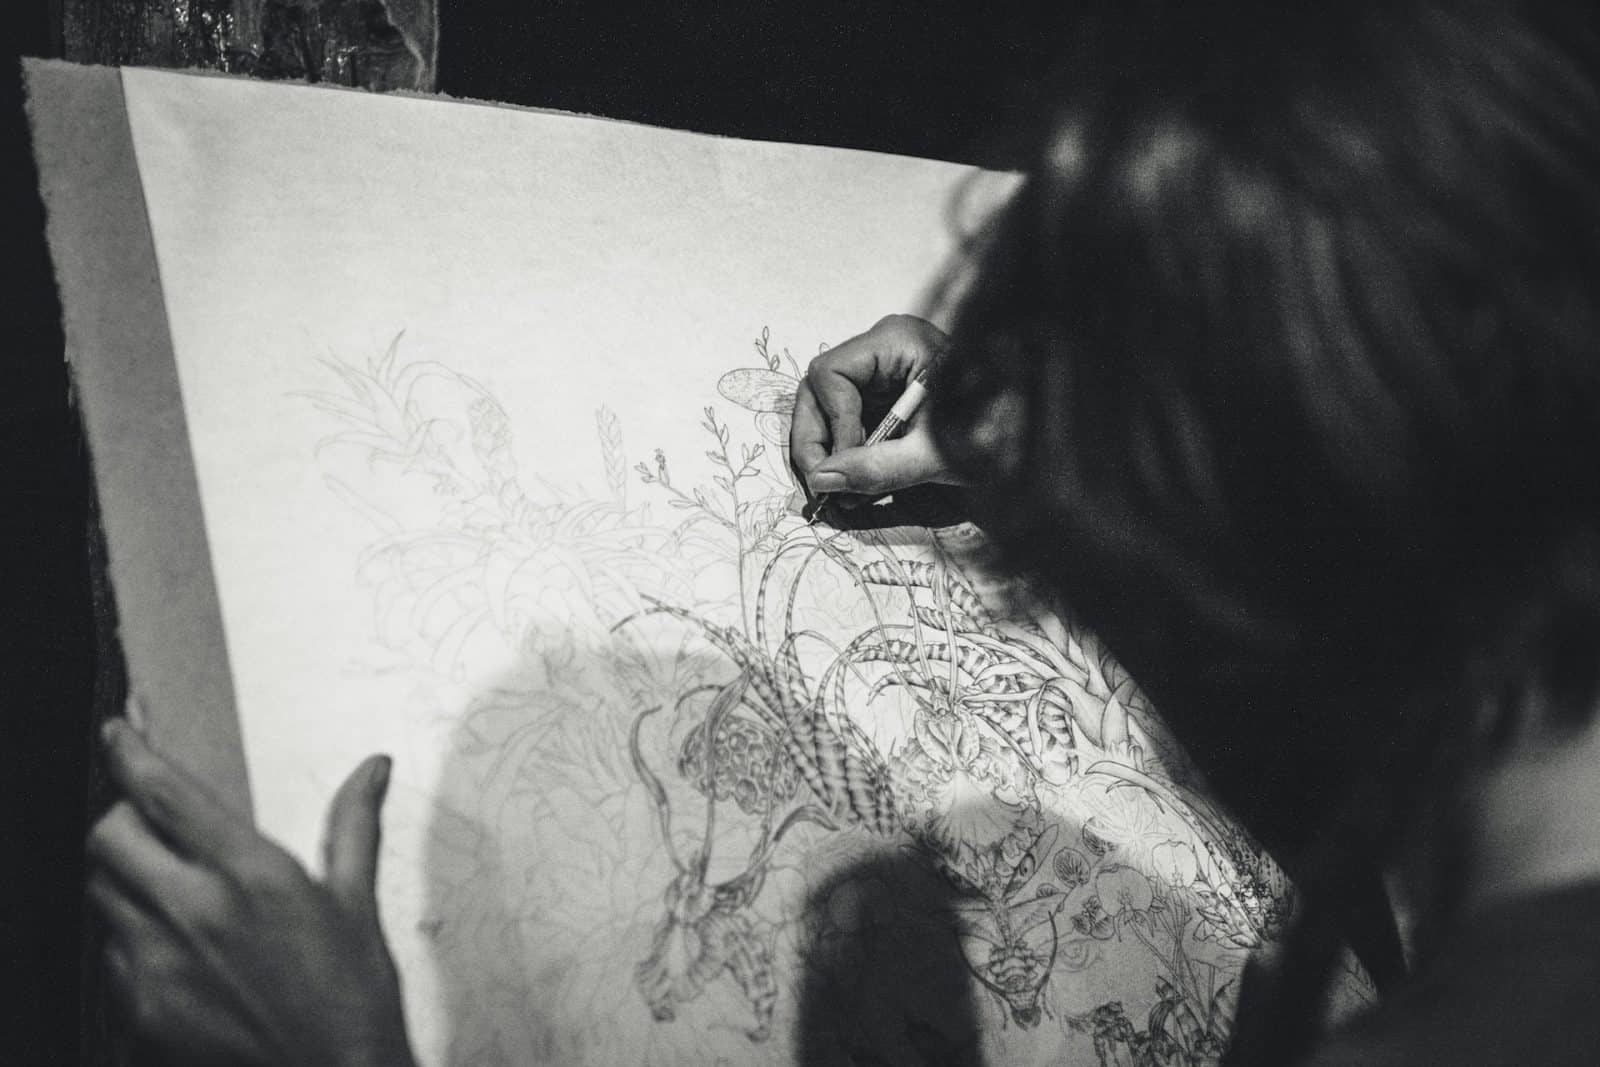
The focal point is a fundamental concept in the art world. It refers to the main area of interest in a piece of artwork that first attracts and holds the viewer’s attention. As an artist, understanding and effectively using the focal point can greatly enhance your work and its impact on the audience. In this essay, we will delve into the intricacies of focal points in art, their importance, and how artists can create them.
Defining the Focal Point in Art
The focal point, also known as the center of interest, can be defined as:
The primary spot or area in an artwork where the viewer’s gaze naturally gravitates toward;
The part of the art piece that stands out due to its distinct visual properties, which can include color, shape, contrast, texture, and/or size;
The central theme, character, or object in the artwork that the artist wishes to emphasize.
The Focal Point in Art History
Throughout art history, artists have utilized the focal point to convey messages, evoke emotions, and create powerful visual experiences. Some notable examples from different art periods include:
Art Movement
Painting Title
Artist
Focal Point
Description
Renaissance
The Last Supper
Leonardo da Vinci
Jesus Christ
Leonardo da Vinci used perspective and figure arrangement to draw the viewer’s attention to Jesus Christ, highlighting his central role in the scene.
Baroque
The Calling of St. Matthew
Caravaggio
St. Matthew
Caravaggio employed chiaroscuro (light and dark contrasts) to create a focal point around St. Matthew, intensifying the dramatic moment of his calling.
Romanticism
Wanderer above the Sea of Fog
Caspar David Friedrich
Lone figure standing on mountain peak
The lone figure in the painting represents the Romantic ideal of an individual facing the sublime power of nature. The viewer’s attention is directed toward the figure, who stands gazing into the foggy abyss.
Impressionism
Water Lilies
Claude Monet
Colorful, textured surface of the water
Claude Monet’s water lily paintings often feature the water’s surface as the focal point. The contrast between the vibrant water lilies and the surrounding vegetation captures the fleeting effects of light and color, a key characteristic of Impressionism.
The Importance of a Focal Point
The focal point plays a critical role in the overall composition and success of an artwork. Here’s why:
Guides the Viewer’s Attention
The focal point acts as a visual guide that leads the viewer’s eye toward the most important part of the piece. It tells the audience what to focus on. Below, we’ll explore how the focal point guides the viewer’s attention using tables, paragraphs, and bullet lists.
Elements of the Focal Point:
Element
Description
Size
Larger elements tend to attract more attention than smaller ones.
Color
Bright, contrasting colors draw the eye and create visual interest.
Position
Elements placed in strategic positions, such as the center or top, stand out.
Contrast
High contrast between an element and its surroundings directs attention.
Focus
Sharpness and clarity make an element more prominent in a blurry background.
Isolation
Separating an element from the rest of the composition enhances its focus.
Direction
Lines or shapes leading toward an element guide the viewer’s gaze.
Importance of the Focal Point:
The focal point plays a crucial role in visual communication. By guiding the viewer’s attention, it helps convey the intended message effectively. Whether it’s a painting, photograph, design, or website, a well-defined focal point creates a visual hierarchy and directs the viewer’s gaze to the key elements.
How the Focal Point Guides Attention:
Size: Larger elements naturally draw the eye first, making them ideal focal points;
Color: Vibrant or contrasting colors make elements stand out and command attention;
Position: Strategic placement, such as centering or placing an element at the top, attracts the viewer’s eye;
Contrast: High contrast between an element and its background increases its visual impact;
Focus: Sharpness and clarity make an element more noticeable, especially against a blurred background;
Isolation: Separating an element from the surrounding elements enhances its prominence;
Direction: Lines, shapes, or leading elements direct the viewer’s gaze toward the focal point.
Designing with the Focal Point in Mind
When creating visual compositions, designers and artists intentionally manipulate various elements to establish a focal point. They utilize size, color, position, contrast, focus, isolation, and direction to guide the viewer’s attention and emphasize the intended subject. By understanding the principles of focal point design, creators can effectively communicate their message and evoke specific emotions in the viewer.
Remember, the focal point acts as a visual guide, leading the viewer’s eye toward the most important part of the piece. By leveraging various design elements, creators can effectively direct attention and communicate their message with clarity.
Creates Visual Interest
An effectively established focal point makes an artwork intriguing and engaging, enticing viewers to explore the piece further. It captures attention, creates visual interest, and encourages a deeper interaction with the artwork. Let’s delve into how the focal point achieves this using paragraphs, bullet points, and examples.
The Power of the Focal Point:
The focal point serves as the visual anchor of an artwork, drawing the viewer’s eye and captivating their attention. It is the center of interest that immediately grabs the viewer’s gaze and compels them to explore the piece further. By strategically placing and highlighting certain elements, artists and designers can create a focal point that generates curiosity and invites viewers to delve deeper into the composition.
How the Focal Point Creates Visual Interest:
Contrast: The focal point often exhibits a high contrast with the surrounding elements, making it visually striking and captivating;
Uniqueness: Unique or distinctive elements within the focal point pique the viewer’s curiosity and make the artwork more intriguing;
Detail and Complexity: Intricate details or complex arrangements within the focal point engage viewers by offering visual depth and rewarding closer inspection;
Surprise or Emotion: The focal point can evoke surprise, emotion, or a sense of wonder, making the artwork more compelling and thought-provoking;
Composition: The placement and arrangement of elements around the focal point contribute to the overall visual interest of the artwork.
Examples of Visual Interest through Focal Points
Scenario
Description
Photograph
A vibrant flower is positioned prominently in the foreground of the image, while the background appears soft and blurred. This composition captures the viewer’s attention and sparks curiosity.
Painting
The painting features a solitary figure with intricate details positioned at the center of the canvas. This creates a strong focal point, drawing the viewer to examine the figure and its surroundings, leading to a narrative within the artwork.
Graphic Design (Website)
The website design includes a bold and contrasting call-to-action button strategically placed at the top of the page. This guides the viewer’s attention and encourages them to explore the site’s content further.
By utilizing various visual techniques and design principles, artists and designers can create focal points that captivate and engage viewers, fostering a deeper appreciation and exploration of the artwork.
Adds Depth and Dimension
A focal point in artwork serves as more than just a visual anchor—it also adds depth and dimension to the composition, making it more dynamic and visually appealing. By strategically establishing a focal point, artists create a sense of depth within the artwork, guiding the viewer’s perception and enhancing the overall visual experience. Let’s explore how the focal point achieves this using paragraphs, bullet points, and examples.
Enhancing Depth and Dimension:
The focal point plays a crucial role in creating a sense of depth within the artwork. By manipulating various visual elements, artists can guide the viewer’s perception and give the illusion of three-dimensionality. The focal point acts as a point of reference, drawing the viewer’s attention and leading them through the composition, while other elements contribute to the overall spatial relationships within the artwork. This interplay of elements adds depth and dimension, making the artwork visually captivating and engaging.
How the Focal Point Adds Depth and Dimension:
Perspective: The focal point can be positioned using principles of linear perspective, creating the illusion of depth and spatial relationships within the artwork;
Overlapping: Overlapping elements around the focal point provide visual cues of depth, as objects partially conceal one another;
Shading and Lighting: Manipulating the play of light and shadow around the focal point adds depth by creating a sense of volume and form;
Scale and Proportion: Elements positioned closer to the focal point may appear larger, while those farther away may appear smaller, contributing to the perception of depth;
Atmospheric Perspective: Gradual changes in color, contrast, and detail as elements recede into the background create a sense of depth and distance.
Examples of Depth and Dimension through Focal Points
Scenario
Description
Landscape Painting
A distant mountain range is positioned as the focal point in the painting. It appears smaller in scale and less detailed compared to objects in the foreground, creating a sense of depth and vastness. This draws the viewer into the painting’s spatial environment.
Still-Life Composition
A carefully rendered fruit bowl is placed centrally, acting as the focal point. The artist uses shading and lighting techniques to create volume and depth within the fruit, making it appear three-dimensional and lifelike.
Digital Illustration
A character with exaggerated scale and proportions is positioned as the focal point in the illustration. This creates a sense of depth and dimension within the overall composition. Other elements placed behind or in front of the character enhance the perception of space.
By skillfully establishing a focal point and employing techniques such as perspective, overlapping, shading, and atmospheric perspective, artists bring depth and dimension to their artwork, creating a visually captivating and immersive experience for the viewer.
Communicates the Artwork’s Message
The focal point in an artwork serves as a powerful tool for the artist to convey the underlying message or theme. It acts as a visual cue that directs the viewer’s attention to the central subject or idea, allowing the artist to communicate their intended meaning effectively. Through strategic placement, symbolism, and emphasis, the focal point becomes a vehicle for storytelling and expression. Let’s explore how the focal point achieves this using paragraphs, bullet points, and examples.
Conveying the Artwork’s Message:
The focal point plays a crucial role in communicating the intended message or theme of the artwork. It serves as the focal center that captures the viewer’s attention and guides their interpretation of the piece. By strategically placing elements and emphasizing specific details, artists can convey emotions, narratives, or concepts, allowing viewers to connect with and understand the underlying meaning of the artwork.
How the Focal Point Communicates the Artwork’s Message:
Emphasis: The focal point highlights the most important element or subject in the artwork, indicating its significance in conveying the message;
Symbolism: Artists often utilize symbolic elements within the focal point to represent abstract ideas, cultural references, or metaphors that enhance the artwork’s message;
Narrative Focus: The focal point can draw attention to a specific scene or moment, directing the viewer’s focus toward the storytelling aspect of the artwork;
Emotional Impact: By placing elements that evoke specific emotions within the focal point, artists can elicit a desired emotional response from the viewer;
Contrast: The focal point can be juxtaposed against other elements to create visual tension, reinforcing the artwork’s message or theme.
Examples of Message Communication through Focal Points
Scenario
Description
Political Artwork
A centrally positioned figure with vivid colors and expressive facial features serves as the focal point in the artwork. It conveys a strong message about the subject’s role or impact in society, capturing the viewer’s attention and prompting reflection.
Surreal Painting
An anomalous object is deliberately placed as the focal point in an otherwise realistic scene in a surreal painting. This symbolizes a deeper meaning and encourages the viewer to interpret the artwork’s message in an imaginative and thought-provoking manner.
Protest/Social Movement Photography
In a photograph capturing a protest or social movement, a group of individuals engaged in an action-oriented pose becomes the focal point. This emphasizes the collective spirit and conveys the shared message of unity and empowerment to the viewer.
Through the strategic use of emphasis, symbolism, narrative focus, emotional impact, and contrast within the focal point, artists effectively communicate their intended message or theme, allowing viewers to connect with the artwork on a deeper level.
The Role of the Focal Point in Different Art Forms
The focal point transcends a variety of art forms, from painting and drawing to photography and sculpture. In each art form, the focal point serves a unique purpose and can be established through diverse techniques.
Painting and Drawing
In painting and drawing, the focal point can be created using various methods, including color, value, and texture contrast, as well as size and detail. Here, the focal point can serve multiple purposes, such as:
Highlighting a key figure, object, or theme;
Guiding the viewer’s gaze through the artwork;
Creating a narrative or telling a story.
Photography
In photography, the focal point is often established through techniques like selective focus, composition, and lighting. The focal point in a photograph can serve various purposes, such as:
Emphasizing the subject of the photograph;
Directing the viewer’s attention to a specific area or element;
Creating visual interest and depth.
Sculpture
In sculpture, the focal point can be achieved through the use of form, shape, and texture. The focal point in sculpture often serves purposes like:
Drawing attention to a specific part or feature of the sculpture;
Creating a sense of movement or flow within the piece;
Establishing a visual hierarchy within the artwork.
Techniques to Create a Focal Point
Artists employ a variety of techniques to establish a focal point in their artwork. These techniques include:
1. Contrast
Contrast is a powerful tool to make a particular area of an artwork stand out. It can be achieved through:
Color: A contrasting color can be used to highlight the focal point. For example, a bright red apple in a composition of green apples will naturally draw the viewer’s attention;
Value: The use of light and dark values can create a strong contrast, emphasizing the focal point. A light object against a dark background or vice versa will become the focal point;
Texture: A different texture can make the focal point stand out. For instance, a smooth object in a field of rough textures will draw attention.
2. Placement
The placement of objects within the artwork can influence where the viewer’s eye is drawn. Techniques include:
Rule of Thirds: This principle suggests that an image should be divided into nine equal parts, with the focal point placed along these lines or at their intersections;
Golden Ratio: This mathematical ratio, roughly 1:1.618, creates a spiral that guides the viewer’s eye to the focal point.
3. Size and Detail
The size and level of detail of an object can make it the focal point. A large or highly detailed object in the midst of smaller or less detailed objects will stand out.
4. Leading Lines
Lines that lead the viewer’s eye to the focal point can be highly effective. These can be actual lines in the artwork or implied lines created by the arrangement of objects.
Tips for Creating a Strong Focal Point
Creating a strong and effective focal point requires careful planning and execution. Here are some tips to help artists establish a successful focal point in their artwork:
Plan Your Composition: Before starting your artwork, spend time planning your composition and determining where the focal point will be. This process will help ensure that your focal point aligns with your intended message or theme;
Experiment with Different Techniques: Don’t be afraid to experiment with various techniques for creating a focal point. Try using contrast, placement, size and detail, and leading lines, and see which techniques work best for your specific artwork;
Balance Your Composition: While the focal point should stand out, it’s important to maintain balance in your composition. The other elements in your artwork should complement the focal point, not compete with it;
Consider the Viewer’s Perspective: Keep in mind how the viewer will perceive your artwork. The viewer’s eye should naturally be drawn to the focal point, and from there, move around the rest of the piece;
Revise and Refine: Don’t be afraid to revise and refine your focal point as you work on your artwork. As your piece evolves, you may find that adjustments are needed to ensure that the focal point remains effective.
Conclusion
The focal point is a crucial element in art that helps engage the viewer, adds depth to the composition, and communicates the artist’s message. By understanding and leveraging various techniques like contrast, placement, size, and detail, effectively create a focal point that captivates the viewer and enhances the overall impact of their artwork.
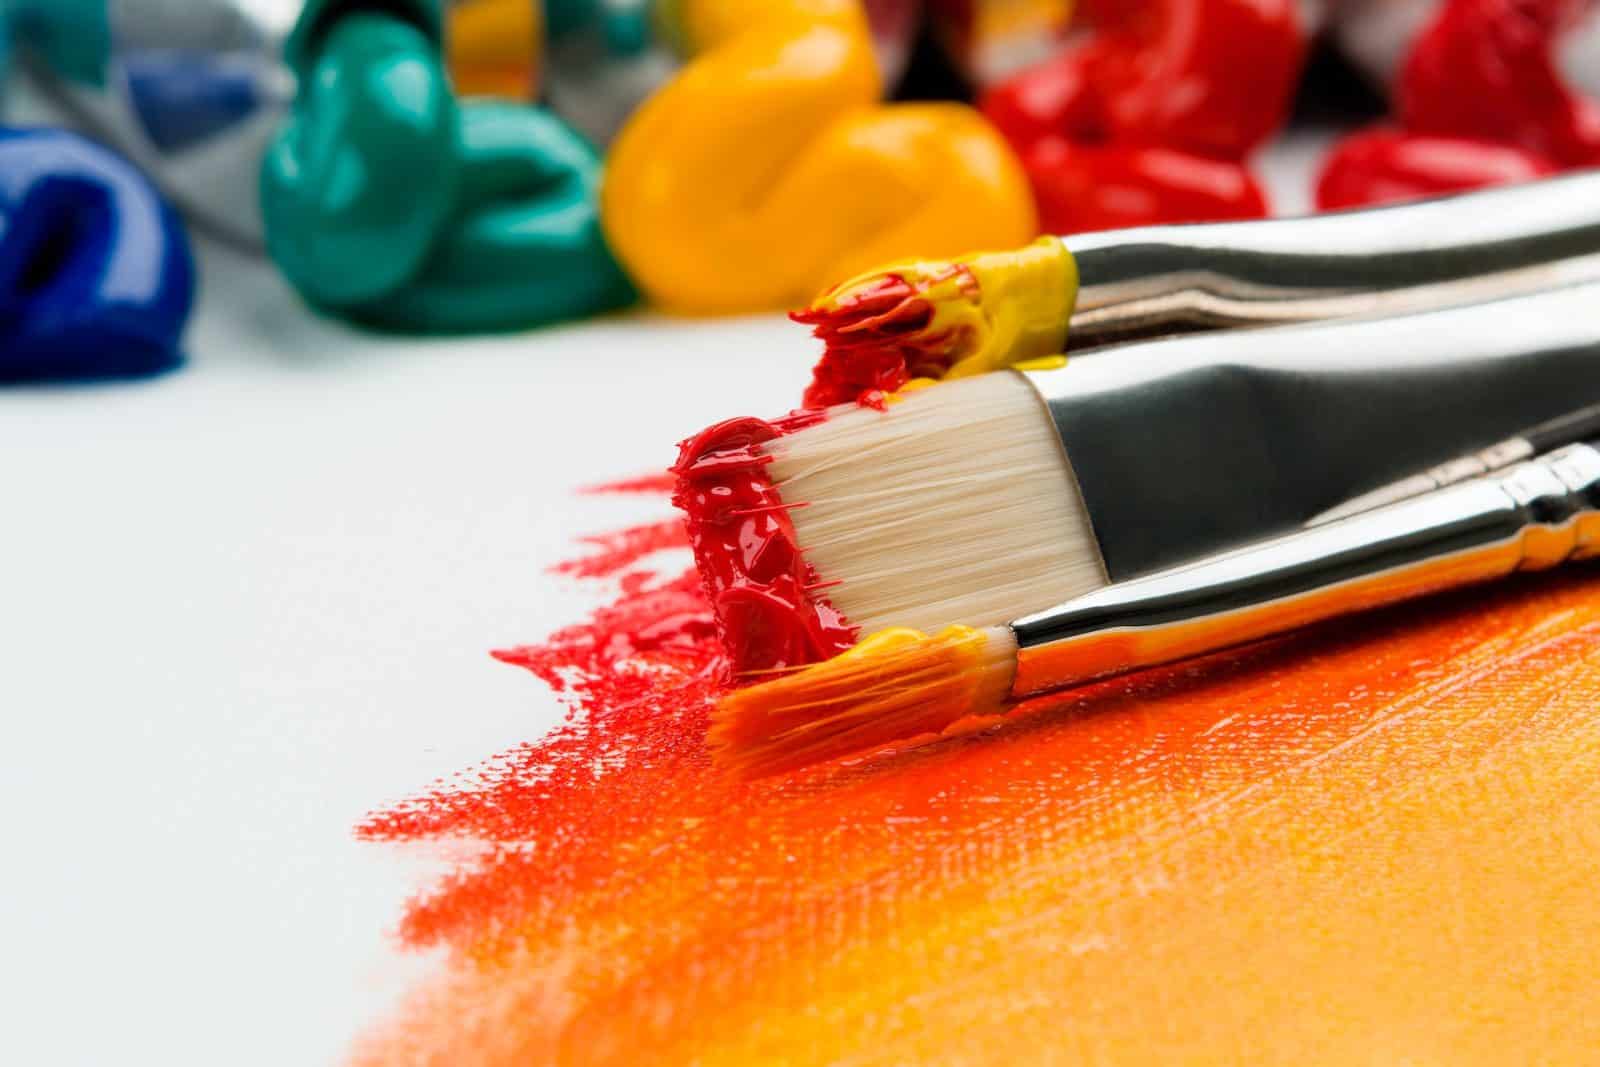
Synthetic paint brushes play a pivotal role in the artistic process, catering to the needs of artists, painters, and DIY enthusiasts. Crafted meticulously from synthetic materials, primarily nylon and polyester, these brushes offer exceptional durability and remarkable versatility when it comes to working with diverse types of paint. The following discourse delves into the realm of synthetic paint brushes, drawing intriguing parallels with their natural counterparts and accentuating their distinct characteristics.
Unraveling the Essence of Synthetic Paint Brushes
Synthetic paint brushes are intricately fashioned using non-natural components, often nylon or polyester, occasionally even combining the two. These materials have been ingeniously engineered to imitate the qualities of natural bristles like hog or sable while surpassing them in terms of longevity and the ability to maintain their shape even after prolonged usage.
Synthetic vs. Natural Paint Brushes: Crucial Contrasts
The ensuing table presents a concise overview of the key disparities between synthetic and natural paint brushes:
Characteristics
Synthetic Brushes
Natural Brushes
Materials
Nylon, Polyester
Animal hair (Hog, Sable, etc.)
Durability
High
Moderate
Shape Retention
Excellent
Good
Suitability with Water-Based Paints
Excellent
Poor
Suitability with Oil-Based Paints
Good
Excellent
Cost
Typically cheaper
Usually more expensive
Characteristics of Synthetic Paint Brushes
Material
Synthetic paint brushes predominantly utilize nylon and polyester as their primary materials. These materials possess distinct characteristics that contribute to the performance of the brushes:
Nylon Bristles: Nylon bristles are renowned for their durability and resilience, making them an ideal choice for handling heavy-bodied paints. They can withstand pressure and provide excellent control during the painting process;
Polyester Bristles: Polyester bristles excel in maintaining their shape over time. They exhibit high resistance to damage caused by solvents or harsh cleaning agents. These bristles are reliable and can endure rigorous painting sessions without compromising their integrity.
Durability
Synthetic brushes are highly esteemed for their exceptional longevity. They demonstrate remarkable resistance to wear and tear, even under continuous usage and rigorous cleaning. Notably, brushes made of polyester excel in preserving their shape over prolonged periods of use. They maintain their original form and structure with great precision, ensuring consistent and precise brushstrokes throughout the entire painting process.
Compatibility
When it comes to compatibility, synthetic brushes boast a wide range of applications. They exhibit outstanding performance when paired with water-based paints, such as acrylics and latex.
Here are some key aspects to consider regarding synthetic brushes and their compatibility:
Ideal for Water-Based Paints: Synthetic brushes are particularly well-suited for water-based paints, enabling smooth and even application;
Handling Water-Based Paints: Synthetic brushes are known for their ability to handle the unique properties of water-based paints, resulting in consistent outcomes;
Suitable for Oil-Based Paints: While synthetic brushes can also be used with oil-based paints, it’s important to note that their performance in this specific context may not match that of natural brushes;
Natural Brushes for Optimal Results: While synthetic brushes can still be effective with oil-based paints, it is worth mentioning that natural brushes are often preferred for achieving optimal results in this medium.
Synthetic brushes exhibit versatility and excel with water-based paints, while still offering a viable option for oil-based paints. However, for the best outcomes in oil-based painting, natural brushes are generally favored.
Compatibility
When considering compatibility, synthetic brushes exhibit a broad range of applications. They excel when used with water-based paints, including acrylics and latex.
Here are some essential points about the compatibility of synthetic brushes:
Well-Suited for Water-Based Paints: Synthetic brushes are particularly suitable for water-based paints, enabling smooth and even application;
Handling Water-Based Paints: Synthetic brushes have the capability to effectively handle the unique properties of water-based paints, ensuring consistent and reliable results;
Usable with Oil-Based Paints: Synthetic brushes can also be used with oil-based paints, although their performance may not match that of natural brushes in this specific context;
Natural Brushes for Optimal Results: It is important to note that while synthetic brushes can still be effective with oil-based paints, natural brushes are often preferred to achieve optimal outcomes in this medium.
Synthetic brushes demonstrate versatility and exceptional performance with water-based paints, while still providing a viable option for use with oil-based paints. However, it is worth considering that natural brushes are generally the preferred choice for obtaining optimal results in such situations.
Affordability
In general, synthetic brushes are known for their affordability compared to natural brushes. This cost-effectiveness, combined with their durability, contributes to their widespread popularity among beginners and professionals alike.
Synthetic brushes are typically more budget-friendly than their natural counterparts;
Their cost-effectiveness, coupled with their long-lasting nature, makes them a preferred choice for artists of all levels of experience.
When compared to natural brushes, synthetic brushes offer an attractive option due to their lower price point without compromising on durability. This makes them highly appealing to a diverse range of artists, irrespective of their skill levels.
Advantages and Disadvantages of Synthetic Paint Brushes
Advantages
Disadvantages
Excellent shape retention even after prolonged use
May not perform as well with oil-based paints compared to natural brushes
High durability, capable of withstanding heavy use and rigorous cleaning
Can show signs of wear faster than natural brushes when used heavily with oil-based paints
Great compatibility with water-based paints
Lack the ‘natural feel’ that some artists prefer
Typically cheaper than natural brushes
Cleaning and Maintenance
One of the notable advantages of synthetic paint brushes is their ease of cleaning and maintenance. Proper care ensures their longevity and optimal performance throughout numerous painting sessions. Here are some essential tips for cleaning and maintaining synthetic brushes:
Rinse Immediately: After each painting session, it is crucial to thoroughly rinse your synthetic brushes. Use lukewarm water to remove any residual paint, preventing it from drying and clogging the bristles;
Use Mild Soap or Brush Cleaner: For more thorough cleaning, you can utilize a mild soap or brush cleaner specifically designed for art brushes. Gently lather the bristles and work the soap or cleaner through them, making sure to reach the base of the bristles. Rinse with water until the water runs clear;
Avoid Harsh Solvents: Unlike natural brushes, synthetic brushes are generally more resistant to solvents. However, it is still advisable to steer clear of harsh solvents when cleaning synthetic brushes, as they may cause the bristles to become brittle or lose their shape over time. Stick to mild soaps and brush cleaners for regular cleaning;
Reshape the Brush: To maintain the desired shape of your synthetic brushes, reshape them while they are still damp after cleaning. Gently use your fingers to reshape the bristles back to their original form. Alternatively, you can utilize a brush guard or wrap the bristles in tissue paper to help them retain their shape as they dry;
Proper Drying: Allow the cleaned synthetic brushes to air dry thoroughly before storing them. Lay them flat or hang them upside down with the bristles pointing downward to prevent water from accumulating near the ferrule, which can lead to damage or loosening of the bristles;
Storage: Store your synthetic brushes in a clean and dry area. Avoid overcrowding them or placing heavy objects on top of them, as this can cause deformation of the bristles. If possible, store them upright in a brush holder or wrap them in a breathable fabric to protect them from dust and potential damage.
Conclusion
Synthetic paint brushes have emerged as an essential companion for artists and painters, presenting a wide array of benefits. Their remarkable longevity, capacity to maintain their form, and compatibility with water-based paints establish them as highly coveted tools. While they may not be the ultimate option for oil-based paints, they still exhibit more than satisfactory performance for most artistic endeavors. Moreover, their affordability distinguishes them, appealing to both novices and seasoned artists.
The decision to opt for synthetic or natural brushes ultimately hinges on personal preference and specific painting needs. However, it is undeniable that synthetic brushes have firmly established themselves in the realm of art supplies. With continuous advancements in manufacturing technologies, they are poised to deliver even better performance and cater to an even wider range of applications in the future.
Pencil leads are not composed of actual lead but of a mixture of graphite and clay. The hardness of the lead is determined by the proportion of these two materials. More graphite results in a softer lead and darker marks, while more clay leads to a harder lead that produces lighter marks.
The lead hardness spectrum is typically classified using a combination of numbers and letters, with ‘H’ standing for hard, ‘B’ for black or bold, and ‘F’ for firm. ‘HB’ is considered the middle of the spectrum. The higher the number before the B, the softer and darker the lead. Conversely, the higher the number before the H, the harder and lighter the lead.
Here is a brief overview of the pencil lead hardness chart:
Hardness Grade
Description
9H to 1H
Hardest lead, produces light marks, perfect for technical drawings
HB
Mid-range hardness, good for general writing and drawing
F
Slightly harder than HB, good for writing
1B to 9B
Softest lead, produces darker marks, ideal for sketching and shading
Breakdown of the Lead Hardness Grades
Let’s delve deeper into the hardness grades to understand their characteristics and best uses.
H Grades
H grades of leads refer to the hardness of graphite leads used in pencils. The H grades range from 9H to 1H, with higher numbers representing harder leads. These leads are known for producing light and sharp lines, making them well-suited for tasks that require precision and intricate detailing, such as technical drawings or architectural plans. Here is a breakdown of the different H grades:
9H: This is the hardest lead available, producing extremely light and precise lines. It is excellent for creating fine and intricate details;
8H to 2H: These grades also have hard leads, offering varying degrees of darkness and line thickness. They are suitable for tasks that demand precision but require slightly darker lines compared to 9H;
1H: This is the softest among the H grades but still produces relatively light and precise lines. It strikes a balance between precision and darkness, making it versatile for different applications.
The H grades are particularly favored by artists, engineers, and architects who require utmost accuracy in their work. Choosing the appropriate H grade depends on the desired line darkness and the level of detail needed, with higher numbers providing finer lines and lower numbers offering slightly darker lines.
HB Grade
The HB grade is a widely used lead hardness in pencils, representing the middle of the lead hardness spectrum. It offers a balanced combination of darkness and hardness, making it versatile for various purposes. The HB grade is commonly employed for general writing tasks as well as light sketching. Here are some key points about the HB grade:
Darkness and Hardness: The HB grade strikes a midpoint between darker and lighter leads. It produces lines that are neither too light nor too dark, making it suitable for everyday writing needs;
Versatility: Due to its balanced characteristics, the HB grade is a popular choice for general writing purposes. It is equally adept at creating neat notes, jotting down ideas, or filling out forms;
Light Sketching: While the HB grade may not be as precise as the harder leads in the H grade range, it can still be used for light sketching or initial outlines in the artwork.
The HB grade is often considered a standard choice for many individuals, as it offers a versatile option for a wide range of writing and sketching tasks. Its ability to strike a balance between darkness and hardness makes it a reliable go-to lead for everyday use.
F Grade
The F grade of lead falls between the hardness of HB and 1H, offering a slightly harder lead than HB but softer than 1H. It is commonly favored by individuals who prefer a slightly lighter line while still desiring the durability associated with harder leads. Here are some key points about the F grade:
Line Darkness and Hardness: The F grade strikes a balance between line darkness and hardness. It produces lines that are slightly lighter than those created with HB, offering a subtle difference in line weight;
Durability: Despite being slightly softer than HB, the F grade retains a level of durability typically associated with harder leads. This makes it well-suited for tasks that require longevity, such as writing or drawing that may undergo frequent erasing or handling;
Preferred Choice: The F grade is often favored by individuals who appreciate a lighter line but still desire a lead that can withstand regular use without excessive smudging or breakage.
The F grade offers a reliable middle ground between the standard HB grade and the harder leads in the 1H range. It provides a subtle variation in line weight while maintaining the durability required for everyday writing and sketching tasks. The F grade is a preferred choice for those seeking a balance between line darkness, lead hardness, and longevity.
B Grades
B grades of leads in pencils refer to the softness of the graphite leads. The B grades range from 1B to 9B, with higher numbers representing softer leads. These leads are known for producing dark and bold lines, making them ideal for various artistic applications that require depth and contrast. Here are some key points about the B grades:
Softness and Darkness: The B grades offer soft leads that result in dark lines. The higher the B grade number, the softer and darker the lead becomes. This range of softness allows for bold sketching, shading, and creating rich, expressive lines in the artwork;
Artistic Applications: The B grades are particularly well-suited for artistic purposes. They enable artists to add depth, texture, and contrast to their drawings, making them ideal for creating shadows, shading, and emphasizing details;
Versatility: While the B grades are commonly associated with artistic work, they can also be used for other purposes where darker lines are desired. They can add emphasis or create bold, legible writing in specific contexts.
The B grades provide artists with a range of options to achieve different effects in their artwork. The softer and darker leads allow for bold lines, shading, and creating a sense of depth. Artists can choose the appropriate B grade based on their desired darkness and the level of expressiveness they wish to convey.
Factors Influencing the Choice of Pencil Lead Hardness
Choosing the right pencil lead hardness depends on several factors:
Writing vs. Drawing: Generally, writers prefer harder leads (F, HB, or 1H) as they maintain a sharp point for longer, reducing the need for frequent sharpening. Artists, on the other hand, may prefer softer leads (B grades) for their depth and versatility in shading;
Line Visibility: If you need your lines to be clearly visible, softer leads (B grades) are your best bet. However, if you’re working on preliminary sketches or technical drawings that require light lines, harder leads (H grades) are the way to go;
Pressure Applied: If you have a heavy hand, a harder lead (H grades) can prevent the lead from breaking and the lines from getting too dark. Conversely, if you write or draw with a light touch, a softer lead (B grades) can provide adequate darkness;
Paper Type: The type of paper you’re using also influences your choice. Rough papers can wear down soft leads quickly, so a harder lead might be more suitable. On smoother papers, softer leads can provide a nice contrast and depth.
Conclusion
Understanding the pencil lead hardness chart is essential for anyone who frequently uses pencils, whether for writing or drawing. The right lead hardness can significantly impact the quality of your work. Remember, choosing the right pencil isn’t just about the brand or the aesthetics, but also about the lead hardness. It’s all about finding the perfect balance that fits your specific needs and style. Experiment with different grades until you find the one that feels just right for you.
Armature in art refers to the foundational structure that gives form and support to a three-dimensional piece of work. It’s often used in sculpture and can be composed of a wide range of materials such as wire, wood, or metal. An armature can be compared to the skeleton in a body, providing a framework on which the “flesh,” or surface material, is built.
Common Materials Used in Armature Construction
Material
Description
Usage
Wire
Flexible, easy to shape, and comes in various gauges (thicknesses). Often used in small to medium-sized sculptures.
Ideal for providing structure to clay or wax models.
Wood
Rigid, sturdy, and can be shaped with tools. Often used in larger, heavier sculptures.
Perfect for supporting heavy materials like stone or metal.
Metal
Rigid and extremely sturdy. Often used in large, outdoor sculptures.
Ideal for large-scale works and outdoor installations.
The Importance of Armature in Art
Support
Armatures provide the necessary support to the sculpture, helping it maintain its shape and structure. This is particularly important for materials like clay, which can sag under their own weight, preventing deformities and preserving the artist’s intended design.
Shape and Form
Armatures serve as a guide for the artist, allowing them to plan out the shape and form of their work before they start applying the surface material, enabling precise control over proportions and overall aesthetics.
Durability
Armatures add durability to the piece, ensuring it can withstand handling, transportation, and the test of time, guaranteeing the longevity of the artwork and safeguarding it against potential damages.
Size
Armatures allow artists to create larger pieces that would be impossible with the sculpting material alone, offering the structural support needed to realize ambitious and grandiose artistic visions.
Flexibility
An armature can be adjusted and readjusted as the work progresses, offering the artist more flexibility during the creation process, facilitating experimentation, and allowing for modifications or refinements to the sculpture’s pose or composition.
Building an Armature
The process of building an armature varies depending on the materials being used and the size and complexity of the sculpture. Below are the general steps followed in armature creation:
Sketching: Start by sketching the sculpture to establish its dimensions and proportions. This sketch will guide the armature construction;
Material Selection: Choose the material for the armature based on the requirements of the sculpture. Consider factors such as size, weight of the sculpting material, and whether the sculpture will be static or movable;
Building the Framework: Construct the armature, starting with the main structural components. This often means building the ‘spine’ or the tallest part of the sculpture first;
Adding Substructures: Add smaller substructures to the main framework. These substructures represent the smaller parts of the sculpture, such as limbs in a human figure;
Adjustments: As you apply the sculpting material to the armature, you may need to make adjustments to the armature’s shape and size. This is a normal part of the process.
Examples of Armature in Art
Armatures are used extensively in different art forms, and a few examples include:
Clay Modeling: Armatures are used to support clay when creating large or complex sculptures. The clay is applied over the armature, which keeps the sculpture from collapsing under its own weight, allowing artists to add intricate details and maintain stability;
Stop Motion Animation: Armatures are the skeletons inside stop motion puppets. They’re made from wire and allow the puppet to hold its shape while being posed for each frame of animation, providing smooth movements and realistic gestures to bring characters to life;
Large-Scale Sculpture: For large metal sculptures, an armature made from steel might be used to support the weight of the sculpture and to withstand outdoor conditions, ensuring the longevity and structural integrity of the artwork while adding an impressive visual impact to public spaces.
Notable Sculptures with Armature
Sculpture
Artist
Material of Armature
The Statue of Liberty
Frédéric Auguste Bartholdi
Iron and Steel
The Little Mermaid
Edvard Eriksen
Metal
The Thinker
Auguste Rodin
Iron
Conclusion
armature is an essential component in the creation of three-dimensional artwork. It provides the necessary support, influences the form and shape, ensures durability, allows for larger-scale work, and offers the artist flexibility during the process. Whether hidden beneath layers of clay or acting as a visible part of the artwork, armatures are an invaluable tool in the artist’s kit.