International

Understanding the Making of an Eraser

Posted on 10 min read 259 views

When you make a mistake in pencil, reaching for an eraser is second nature. This humble office and school supply plays a crucial role in our daily tasks, yet how much do we really know about it? In this article, we’ll explore what an eraser is made of, the process of creating one, and the different types available.

The Essential Components of an Eraser

An eraser is typically made up of several ingredients. The primary ingredients include rubber, sulfur, vegetable oil, and pumice. However, the exact composition can vary depending on the type of eraser.

Primary IngredientFunction
RubberProvides the base for the eraser, offering flexibility and durability.
SulfurActs as a vulcanizing agent, improving the eraser’s hardness and durability.
Vegetable oilUsed as a softener, providing the eraser with a smooth texture.
PumiceActs as an abrasive, enhancing the eraser’s ability to remove marks.

Rubber

As the base material, rubber provides the eraser’s core properties. Two types of rubber are commonly used:

  • Natural rubber: Derived from the sap of the rubber tree, it’s flexible, resilient, and offers excellent erasing capabilities. However, natural rubber can become sticky or crumbly over time;
  • Synthetic rubber: Manufactured from petroleum byproducts, it provides more consistent performance and longevity.

Sulfur

Sulfur is used to vulcanize the rubber, a process that involves heating the rubber with sulfur to create cross-links between the rubber molecules. This makes the eraser more durable and less likely to crumble.

Vegetable Oil

Vegetable oil is used to soften the rubber more pliable. It ensures that the eraser maintains a smooth texture, preventing it from being too harsh on the paper.

Pumice

Pumice, a type of volcanic ash, is included in erasers as an abrasive. It’s this ingredient that helps the eraser remove pencil marks from the paper effectively.

The Making Process of an Eraser

The process of making an eraser is quite straightforward and involves the following steps:

Mixing

In the process of rubber production, one crucial step is mixing the various components to create a uniform mixture. This involves combining rubber, sulfur, vegetable oil, and pumice in a large vat. The ingredients are carefully measured and added to the vat, where they are thoroughly blended until they form a homogenous paste. This mixing stage is vital to ensure that the ingredients are evenly distributed, allowing for consistent quality and performance of the rubber material. The following are some key points regarding the mixing process:

AspectDetails
IngredientsRubber, sulfur, vegetable oil, and pumice
EquipmentA large vat or mixer
MeasurementsPrecisely measured according to the desired formulation
Mixing timeContinues until a homogenous paste is achieved
HomogeneityThorough blending ensures even distribution of ingredients
Quality controlRegular checks performed during mixing to verify consistency
PurposeFacilitates chemical reactions for vulcanization, enhancing strength and durability of rubber

Extrusion

After the mixing process, the homogenous paste obtained from the rubber, sulfur, vegetable oil, and pumice mixture undergoes the extrusion stage. This involves passing the mixture through an extruder, a specialized machine designed to shape the material into long, cylindrical rods. The extruder applies pressure and forces the paste through a die, which gives the rubber its desired shape and dimensions. The extrusion process allows for precise control over the final form of the rubber material. Here are some key points about the extrusion stage:

AspectDetails
EquipmentAn extruder machine designed specifically for rubber processing
Extrusion processThe homogenous paste is fed into the extruder, where it is heated and forced through a die to shape the rubber into the desired form
DieThe die determines the specific shape and dimensions of the extruded rubber
Heating and pressureThe extruder applies heat and pressure to soften the rubber mixture and facilitate its passage through the die
VersatilityThe extrusion process can produce various forms, including rods, tubes, profiles, and more, depending on the die used

Vulcanization

After the extrusion stage, the long cylindrical rods produced from the rubber mixture undergo a crucial process known as vulcanization. Vulcanization involves subjecting the rubber rods to heat, which triggers chemical reactions within the material, resulting in the hardening and increased durability of the rubber. The rods are typically placed in an oven or heated chamber, where they are exposed to controlled temperatures for a specific duration. During this process, sulfur cross-links the polymer chains in the rubber, transforming it from a soft and pliable material into a resilient and tough one. The following are key points regarding the vulcanization process:

AspectDetails
Heating methodThe rubber rods are subjected to heat in an oven or heated chamber
Chemical reactionsThe heat initiates sulfur cross-linking of the polymer chains in the rubber
HardeningVulcanization transforms the rubber from a soft state to a harder, more durable form
Durability enhancementThe cross-linking increases the strength, elasticity, and resistance to wear and aging
Time and temperatureThe vulcanization process involves precise control of time and temperature for optimal results

Cutting

After the vulcanization process, the long cylindrical rods of rubber are allowed to cool down. Once cooled, they undergo a cutting stage to transform them into individual erasers of the desired lengths. The cooled rubber rods are fed into a cutting machine or a similar tool, where they are precisely sliced into the required sizes. This cutting process ensures the production of individual erasers with consistent dimensions and shapes. Here are some key points regarding the cutting stage:

AspectDetails
EquipmentCutting machine or a similar tool
CoolingThe vulcanized rubber rods are cooled down before the cutting process begins
PrecisionThe cutting machine ensures precise and accurate cuts to achieve uniform eraser lengths
Desired lengthsThe rubber rods are cut into individual erasers according to specific length requirements
ConsistencyCutting guarantees consistent dimensions and shapes for each eraser

Quality Control

After the cutting process, each individual eraser undergoes a rigorous quality control inspection. This inspection is crucial to ensure that only erasers of the highest quality are packaged and shipped to retailers. Trained quality control personnel carefully examine each eraser, checking for any defects, such as uneven cuts, surface imperfections, or inconsistencies in shape or size. Erasers that meet the required quality standards are selected for packaging, while any erasers that do not pass the inspection are discarded or sent for further adjustments. Here are some key points regarding the quality control stage:

AspectDetails
InspectionTrained quality control personnel carefully examine each eraser
Defect detectionThe inspection focuses on identifying any defects or imperfections
CriteriaThe erasers are evaluated against predetermined quality standards
PackagingErasers that pass the inspection are selected for packaging
Discard or adjustmentErasers that do not meet the quality standards are discarded or sent for further adjustments
ShippingPackaged erasers are then shipped to retailers for distribution

Different Types of Erasers

There are several types of erasers, each designed for a specific purpose or to work with a particular kind of medium. Here’s a brief overview:

Rubber Erasers

Rubber erasers are widely recognized as the most commonly used type of erasers, specifically designed for removing graphite marks from paper. They are typically rectangular and often colored pink, but they can also be found in different shapes and sizes to cater to individual preferences. These erasers effectively eliminate pencil marks without damaging the paper’s surface, making them a popular choice among students, artists, and professionals. The soft and pliable nature of rubber erasers allows for precise and gentle erasing, enabling users to correct mistakes with ease. Some key features of rubber erasers include:

  • Versatile: Rubber erasers are primarily intended for erasing graphite marks but can also be used to remove certain types of colored pencil marks and some ink stains;
  • Gentle on Paper: They are designed to erase without causing excessive friction or leaving smudges on the paper, ensuring the integrity of the original document;
  • Easy to Handle: The rectangular shape of rubber erasers provides a comfortable grip and allows for controlled erasing, making it convenient for detailed work;
  • Long-Lasting: These erasers are known for their durability and ability to withstand extended use before needing replacement;
  • Affordable: Rubber erasers are widely available and tend to be cost-effective, making them accessible to a broad range of users.

Vinyl Erasers

Vinyl erasers, also referred to as plastic erasers, are a type of eraser that differs from rubber erasers in terms of toughness and abrasiveness. They are particularly effective for erasing ink or darker pencil marks due to their more abrasive nature. While rubber erasers are known for their gentle and precise erasing, vinyl erasers provide a more robust and thorough erasing action. These erasers are often white and rectangular in shape, although variations in size and form are available. Some key characteristics of vinyl erasers include:

  • Ink Erasing Power: Vinyl erasers excel at erasing ink marks, making them a preferred choice for correcting mistakes made with pens or markers. They are also efficient at removing darker pencil marks that may be more resistant to traditional erasers;
  • Durability: Compared to rubber erasers, vinyl erasers are generally more durable and long-lasting. They can withstand more extensive use before wearing down or losing effectiveness;
  • Abrasive Action: Vinyl erasers have a slightly rougher surface than rubber erasers, allowing for more aggressive erasing. However, caution must be exercised when using them on delicate or thin paper to avoid potential damage;
  • Smudging: While vinyl erasers are efficient at removing marks, they may occasionally leave behind smudges, particularly when used on graphite or softer pencil leads. It is advisable to test them on a small area before erasing larger sections;
  • Versatility: In addition to ink and dark pencil marks, vinyl erasers can also effectively erase colored pencil marks, charcoal, and pastel markings.

Kneaded Erasers

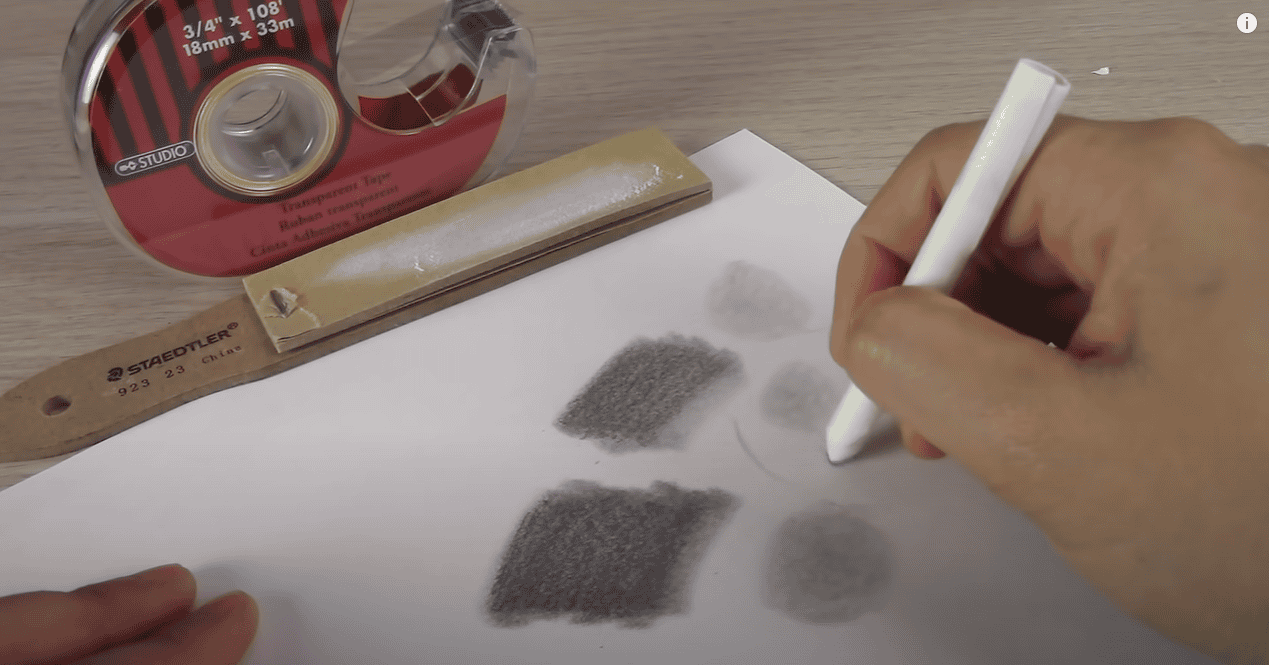
Kneaded erasers are unique erasers that offer a pliable and moldable texture, allowing users to shape them according to their needs. Artists frequently utilize kneaded erasers to lighten or entirely remove charcoal, pastel, or graphite marks. Unlike rubber or vinyl erasers, kneaded erasers do not leave behind eraser debris, making them ideal for delicate artwork. Here are some key features of kneaded erasers:

  • Malleability: Kneaded erasers have a soft and pliable consistency, allowing artists to shape them into various forms like balls, cones, or points. This adaptability enables precise erasing and selective removal of marks;
  • Gentle Erasing: These erasers gently lift off the medium from the paper’s surface, making them well-suited for delicate or textured materials like charcoal and pastels. They can also lighten graphite drawings without damaging the paper;
  • No Residue: Kneaded erasers do not generate eraser crumbs or residue like traditional erasers. Instead, they absorb and “pick up” the medium, keeping the working area clean and minimizing smudging;
  • Longevity: Kneaded erasers can be used repeatedly by kneading and stretching them to expose fresh surfaces. This feature extends their lifespan, making them a cost-effective choice for artists;
  • Blending Tool: Apart from erasing, kneaded erasers can also be used as a versatile blending tool. Artists can mold them into soft edges or smooth gradients, achieving unique artistic effects.

Gum Erasers

Gum erasers are a type of eraser known for their softness and gentle erasing action, making them particularly suitable for fine papers and delicate surfaces. They are less abrasive compared to other erasers, ensuring minimal damage or smudging. When used, gum erasers tend to crumble as they erase, effectively absorbing graphite or pencil marks and leaving the paper clean. Here are some key characteristics of gum erasers:

  • Softness: Gum erasers have a soft and pliable texture, allowing for smooth and gentle erasing without causing unwanted paper damage. This makes them an excellent choice for thin or delicate papers, such as tracing paper or vellum;
  • Non-Abrasive: Unlike some other erasers, gum erasers have a low level of abrasiveness, which reduces the risk of creating marks or indentations on the paper surface. They offer a more forgiving erasing experience, particularly when working on sensitive materials;
  • Minimal Residue: Gum erasers tend to crumble and break apart as they erase, effectively absorbing the graphite or pencil marks. This characteristic helps keep the paper clean and prevents smudging or spreading of eraser debris;
  • Versatility: While gum erasers are commonly used for erasing graphite or pencil marks, they can also be effective in removing certain types of ink, especially if the ink has not completely dried or has a certain level of solubility;
  • Limited Lifespan: Due to their crumbling nature, gum erasers tend to wear down more quickly compared to other erasers. The regular replacement may be necessary to ensure optimal erasing performance.

Electric Erasers

Electric erasers are mechanized tools specifically designed for precision erasing. They feature a spinning eraser tip powered by electricity, which allows for controlled and accurate erasing in detailed areas. Architects and artists, who often require precise and intricate erasing, commonly favor electric erasers. Here are some key features of electric erasers:

  • Precision Erasing: Electric erasers offer exceptional precision, allowing users to erase fine lines, small areas, or intricate details with ease. The spinning eraser tip provides controlled and targeted erasing, making them invaluable for architectural drawings, technical illustrations, and other intricate artwork;
  • Powered Performance: These erasers are battery-operated or come with an electrical cord for power supply. The motorized mechanism ensures consistent and efficient erasing, reducing the effort and time required for erasing compared to manual erasers;
  • Versatility: Electric erasers can be used for erasing various media, including graphite, charcoal, colored pencils, and even certain types of ink. They provide versatility in erasing different materials without causing excessive damage or smudging;
  • Eraser Refills: Electric erasers often come with replaceable eraser refills, allowing users to easily swap out erasers when they become worn or depleted. This feature ensures a continued supply of fresh erasers for uninterrupted use;
  • Ergonomic Design: Many electric erasers are designed with comfort and ease of use in mind. They often feature ergonomic handles or grips, allowing for prolonged erasing sessions without strain or fatigue.

Conclusion

The humble eraser is a marvel of simplicity and function. By understanding its materials and making process, we gain a deeper appreciation for this everyday tool. Whether you’re a student, artist, or professional, there’s an eraser out there perfectly suited to meet your needs.

Share

By

The Art of Stumping: An In-depth Exploration of the Stumping Tool

Posted on 7 min read 48 views

In the realm of art, a multitude of tools exist, each serving its unique purpose. Today, our focus is on one such tool—the stumping tool, often referred to as a blending stump or tortillon. This article is an extensive guide that dives into the stumping tool’s use, techniques, and care.

Understanding the Stumping Tool

Before we delve into the mechanics of using a stumping tool, it’s essential to understand what it is. A stumping tool, or blending stump, is a cylindrical drawing tool, tapered at the ends, made from compressed paper. They are invaluable for blending and smoothing drawings, typically those created with graphite, charcoal, or pastel.

Differentiating between a Blending Stump and a Tortillon

Though often used interchangeably, a blending stump and a tortillon are not quite the same. Here are the differences to guide you:

Blending StumpTortillon
MaterialCompressed paperSingle sheet of rolled paper
EndsTwo pointed endsOne pointed end, one flat end
SizesVariety of sizesGenerally smaller
BlendingBetter for larger areasIdeal for smaller, detailed areas

Techniques for Using the Stumping Tool

Now that we have a basic understanding of the tool, let’s delve into various techniques for using the stumping tool.

Layering

Layering is a fundamental technique in art that involves building up a composition by applying successive layers of color or tone. When employing layering, it is advisable to begin with lighter strokes and progressively work towards darker layers. This method provides artists with enhanced control over the blending process, resulting in a more nuanced and cohesive final piece. By following this approach, artists can achieve a sense of depth, dimension, and realism in their work. Some key points to keep in mind when using layering include:

  • Begin with lighter strokes and gradually increase the intensity of the colors or tones;
  • Build up the layers gradually, allowing each layer to dry or set before applying the next one;
  • Use different brush techniques, such as dry brushing or glazing, to achieve desired effects;
  • Experiment with different opacity levels of paints or drawing materials to create variations in texture and transparency;
  • Pay attention to the composition’s overall values and ensure a proper balance between light and dark areas;
  • Adjust the pressure and angle of the brush or drawing tool to achieve desired levels of coverage and texture.

Direction

When drawing or sketching an object, it is crucial to pay attention to the direction of your strokes. By following the contour of the object, you can effectively preserve its form and create a more realistic representation. If you’re drawing a rounded object, such as a sphere or a curved surface, it is recommended to make rounded strokes that mimic the shape. On the other hand, when depicting a flat object, like a tabletop or a book, utilizing straight strokes helps convey its flatness and maintain its visual integrity. Consider the following points when working with directional strokes:

  • Observe the object carefully and analyze its shape and structure before starting your drawing.
  • Identify the primary contours and lines that define the object’s form;
  • Align your strokes with these contours, using the direction of the lines as a guide;
  • For rounded objects, use curved strokes that follow the curvature of the form;
  • For flat objects, employ straight strokes that align with the object’s edges or planes;
  • Adjust the length and thickness of your strokes to capture the subtleties and variations in the object’s surface;
  • Experiment with different pressures and angles to achieve a sense of depth and three-dimensionality.

Pressure

The application of varying pressure during the artistic process can significantly impact the visual outcome and texture of a work. Understanding how to manipulate pressure allows artists to create different effects and achieve desired results. When aiming for a smoother blend, it is advisable to apply more pressure to the medium, whether it be a brush, pencil, or other drawing tool. This increased pressure helps to distribute the medium more evenly, resulting in a seamless transition between colors or tones.

Conversely, when desiring a lighter blend or more delicate effect, reducing the pressure applied to the medium is key. This lighter touch enables finer lines, subtle gradients, and a softer overall appearance. Here are some key points to consider when working with pressure:

  • Experiment with various levels of pressure to become familiar with the range of effects you can achieve;
  • Practice controlling the pressure applied to the medium, gradually increasing or decreasing it as needed;
  • Use heavier pressure when aiming for bold or solid areas, creating a denser application of color or tone;
  • Employ lighter pressure for delicate details, highlighting, or areas that require a gentle touch;
  • Be mindful of the medium you’re using, as different materials may respond differently to pressure;
  • Explore the interplay between pressure and other techniques, such as layering or blending, to enhance your artwork further.

Cross-Hatching

Cross-hatching is a versatile drawing technique that involves the creation of intersecting sets of parallel lines, forming a mesh-like pattern. This method can be employed to add texture, shading, and depth to a drawing. By using a blending tool, such as a stump or tortillon, artists can further enhance the effect by smudging and blending these lines, resulting in a visually engaging texture. Here are some key points to consider when working with cross-hatching:

  • Start by identifying the areas in your drawing where you want to apply cross-hatching for texture or shading;
  • Use a pencil or pen to create sets of parallel lines in one direction. The spacing and thickness of these lines can vary depending on the desired effect;
  • Overlay another set of parallel lines in a different direction, intersecting with the first set. The angle and density of the second set will affect the final appearance;
  • Continue adding more layers of intersecting lines to increase the complexity of the texture or shading;
  • Use a blending tool, such as a stump or tortillon, to gently smudge and blend the lines together, creating a seamless and cohesive texture;
  • Experiment with different pressures, angles, and line densities to achieve a range of effects, from subtle textures to bold and dynamic patterns.

Feathering

Feathering is a valuable technique in drawing that helps create a smooth and gradual transition between a shaded area and a lighter area, resulting in a soft and subtle effect. This method is particularly useful when aiming for a gentle gradation of tones or when transitioning from shadows to highlights. To achieve feathering, artists often utilize a blending tool, such as a stump or tortillon, to gently blend out the edges of the shaded area towards the lighter area. Here are some key points to consider when working with feathering:

  • Identify the areas in your drawing where you want to create a soft transition between the shaded and lighter areas;
  • Apply the desired shade or tone to the shaded area using light, even strokes;
  • Take the blending tool, such as a stump or tortillon, and gently drag or blend the edges of the shaded area towards the lighter area;
  • Use a light touch and gradually increase the pressure as needed to achieve a seamless transition;
  • Blend the shaded area with short, light strokes in the direction of the transition, ensuring a smooth and even fade.

Cleaning and Care of the Stumping Tool

Just like any other art tool, stumping tools require proper care to maintain their effectiveness. Here’s how you can keep your stumping tool in top shape:

  1. Regular Cleaning: Use a piece of sandpaper or a sandpaper pad to clean the stumping tool. Gently rub the dirty end of the stump on the sandpaper in a circular motion;
  2. Shaping: You can also use sandpaper to shape the stump. If you want a sharper point, for instance, rotate the stump at an angle against the sandpaper;
  3. Storage: Keep your stumping tools in a dry place to prevent them from absorbing moisture, which could damage the paper;
  4. Repurposing: Don’t throw away your old stumps. You can assign different stumps to different materials, like graphite or charcoal, to avoid cross-contamination.

Pro Tips for Using the Stumping Tool

Here are some additional tips to elevate your experience with the stumping tool:

  • Always start with a clean stump when working on a new drawing or switching between materials;
  • Use the larger end of the stump for blending larger areas and the smaller end for more detailed areas;
  • Control the level of blending by adjusting the pressure you apply;
  • For darker areas, load the stump with material from your drawing medium before blending;
  • Don’t overuse the stump. Sometimes leaving areas unblended can create a striking contrast and add depth to your piece.

Common Mistakes to Avoid

While using a stumping tool can be straightforward, it’s easy to fall into some common traps. Here are a few mistakes to avoid:

  • Overblending: While it can be tempting to blend everything smoothly, overblending can cause your drawing to lose texture and depth;
  • Neglecting Cleaning: If you don’t clean your stump regularly, it can get loaded with too much material and become less effective at blending;
  • Ignoring Light and Shadow: Remember to consider the light source when you’re blending. This will help you maintain the right contrast in your drawing;
  • Using Wrong Size: Using a stump that’s too large for a small area can lead to a lack of precision. Conversely, a small stump may not blend larger areas effectively.

Conclusion

Mastering the use of a stumping tool can greatly enhance your drawing skills, allowing you to create smooth transitions, add depth, and bring a sense of realism to your work. It’s a tool that requires practice, patience, and an understanding of its proper care and usage.

Remember, while blending can help smooth out your artwork, knowing when to leave some areas unblended is equally important to create balance and contrast. The journey to mastering this tool is one of trial and error, so keep practicing, keep learning, and keep creating.

In the vast and colorful world of art, a stumping tool is a simple yet powerful weapon. It’s not just a tool for blending; it’s a tool for bringing your vision to life. So, grab your stumping tool and let your imagination take flight.

Share

By

Exploring the Sublime Symmetry of Monochromatic Artistry

Posted on 11 min read 48 views

Explore the mesmerizing world of monochromatic art as you set off on a captivating journey, where the dominating presence of a single color enthralls the senses and reveals a cosmos of aesthetic harmony. Single-color art has inspired and aroused the interest of viewers and artists alike with its captivating paintings and evocative photographs.

Join us on this enlightening journey as we explore the techniques, profound meaning, and continuing impact of chromatic harmony on the entire spectrum of artistic expression. Prepare yourself to witness the ethereal grandeur contained inside a single hue.

The Essence of Monochromatic Art

Monochromatic art is a monument to the strength of simplicity and the evocative quality of a single color in the vast world of art, where colors dance and emotions collide. It is distinguished by the use of just one color, which enthralls spectators with its capacity to reveal emotional depth through restrained means.

The term “monochromatic art” describes works of art that only use one color or many tints of the same hue. The decision to sacrifice a colorful palette in favor of concentrating on the subtleties and potential of a single chromatic spectrum was made on purpose. Tone-based art fosters a deep examination of its features and the emotional impact it might express by limiting the artist to a single hue.

Can you believe the extraordinary power a vibrant painting holds to awaken profound thoughts and stir the deepest emotions within an individual? It is an undeniable truth that it possesses this ability and gracefully fulfills its purpose.

However, the realm of monochromatic art deviates from the superficial, flamboyant aspects of color. Instead, it redirects our gaze to the core essence of the subject at hand. While color has a tendency to elicit emotions and selfishly capture our attention, it often detracts from the intended emphasis of the artist, distorting the meaning and concealing technical artistry behind its vibrant facade.

The Evolution of Monochrome Painting

Monochrome painting has played a significant role in the artistic exploration and understanding of the world throughout history. It serves as a profound dialogue between artists and nature, offering glimpses into the infinite universe. The serene and tranquil qualities found in ink and water painting, prevalent in ancient Chinese and Japanese art schools, embrace symbolism and understatement.

Dating back to the 10th-13th centuries in China, the monochromatic Suiboku (or sumi-e) painting style arrived in Japanese culture by the 14th century. With its concise elegance, fluid lines, and soft tonal spots of ink blending on a white background, this monochromatic yet incredibly expressive art form carried deep philosophical undertones:

  • European Baroque paintings in the seventeenth century shared a strong connection with monochromatic techniques;
  • Notable Italian artists like Giuseppe Crespi, Michelangelo Caravaggio, and Domenico Fetti showcased the allure of monochromatic painting;
  • Spanish masters such as El Greco and Diego Velázquez, as well as Dutch painters including Rembrandt van Rijn, Jan Vermeer, and Gerard Terborch, also demonstrated mastery in monochromatic art.

The twentieth century marked a revolutionary period in global art, characterized by a profound rejection of past artistic traditions and a search for new visual aesthetics. Monochrome painting experienced a resurgence, detached from the constraints of reality and focused on introspective emotions and deep convictions.

The Suprematist philosophy introduced by Kazimir Malevich birthed the iconic black square on a white background, which symbolized the pinnacle of contemplative purity and liberation from representational forms. Malevich’s geometric white figures dissolved into the luminous backdrop of the canvas, asserting the movement towards “objectless white nature” as the ultimate stage of a contemplative state.

In the works of Pablo Picasso during his “blue” and “pink” periods, we witness a poignant transition from the anguish of cold gray-blue shades to the gentle warmth of coral and beige tones. Symbolically bridging these periods, “Girl on a Balloon” emerges, delicately balanced between happiness and pain, life and nothingness, light and darkness, capturing the complexities of human experience.

Throughout history, monochrome painting has transcended cultures and time periods, serving as a visual language to convey profound emotions, philosophical concepts, and the introspective essence of the human experience.

What Is a Monochrome Painting?

A monochrome painting, which is sometimes misunderstood, goes beyond the idea that it can only be in black and white. A single hue is harmoniously united in this work of art, allowing for a magnificent investigation of many tints and shades within the selected color. In this case, the hue acts as the cornerstone, emulating a distinctive and alluring color identity.

If you look closer, tints become darker variants of the color, giving the artwork richness and depth. On the other hand, tints provide ethereal brilliance, adding a gentle touch of illumination to the composition. Black and white are skillfully added to these hues to create an interplay between them that reveals a range of monochromatic possibilities.

Think of an artist traveling in monochrome through the regal world of blue, for instance. The artist masterfully manipulates the brush to create an orchestration of various depths within that blue color using a palette ornamented with blue paint, a touch of white, and a trace of black.

The addition of white gives life to beautiful wisps of light, evoking sublime tranquillity, while the addition of black creates velvety shadows that inspire a sense of mystery and intrigue. A monochromatic painting essentially embraces a single color and all of its limitless variations, drawing viewers into a universe where color acts as a potent medium for creative expression.

Monochromatic Color Scheme and Monochromatic Colors

A monochromatic color scheme is based on the idea of using one color, like blue or green, as the main focal point. The hue of the chosen color serves as the cornerstone upon which the composition as a whole is constructed. To provide visual interest and depth to the artwork or design, hue variations such as tints and hues are used.

Components of a Color Scheme

A variety of color combinations are included in color schemes that are used in artwork or interior design projects. Monochromatic, complementary, split complementary, analogous, triadic, rectangular, and square are the seven basic types of color schemes. It has four essential parts, with a monochromatic color palette as the focal point:

  • Hue: The hue stands for the initial color picked as the main focal point of the design. It serves as the composition’s focal point in monochrome;
  • Shade: Black is added to hues to produce shades, which are deeper variants of the original color. These hues give the artwork or design more depth and contrast;
  • Tone: The lightness or darkness of an art piece is referred to as the tone. It’s accomplished by combining the hue with various gray levels. The final tones look well-balanced and subtle;
  • Tint: By mixing white into the hue, tints are created, giving rise to lighter variations of the primary color. The monochrome composition is given a sense of brightness and airiness by the addition of tints.

Monochromatic vs. Achromatic

Achromatic color schemes distinguish themselves by using just black, white, and a variety of grays, as opposed to monochromatic color schemes, which center on a single color with its many shades, tones, and tints.

Here are the key differences between monochromatic and achromatic color schemes:

Monochromatic color schemes:

  • Revolve around a single color as the central theme;
  • Utilize various shades, tones, and tints of the chosen color;
  • Incorporate colors from the traditional color wheel;
  • Evoke specific moods and bring unity to spaces;
  • Considered a restrictive art form with limited colors.

Achromatic color schemes:

  • Utilize only black, white, and a range of grays;
  • Do not incorporate colors from the traditional color wheel;
  • Reliant solely on the grayscale spectrum;
  • Create a sense of contrast and simplicity;
  • Also considered a restrictive art form with limited colors.

Despite their differences, both monochromatic and achromatic color schemes:

  • Utilize a limited number of colors;
  • Showcase the creative potential within self-imposed limitations;
  • Contribute to creating harmonious visual compositions.

All in all, achromatic color schemes rely on black, white, and gray, whereas monochromatic color schemes concentrate on a single hue and all of its shades, tones, and tints. Both methods embrace limitations and demonstrate the creative possibilities that result from doing so.

The Significance of Working with a Single Hue

Artists can explore the nuances and complexity of color in great detail by using just one color. It forces them to utilize a single shade’s potential by working with it to arouse various emotions, settings, and stories. The lack of many colors sharpens the focus on tone differences, textures, and the interaction of light and shadow, improving the artwork’s overall impact.

The potential of monochrome painting to convey powerful emotions through simplicity is one of its outstanding qualities. Artists can focus on the sheer force of their selected color by eliminating the distractions of a rich palette.

Thus, monochromatic art becomes a vehicle for emotions that truly resonate with the viewers, whether it’s the tranquility of blue, the intensity of red, or the sorrow of gray.

Techniques and Methods

The interaction of light and shadow takes center stage in monochrome painting. One color’s tonal values can be expertly adjusted by artists to convey depth, dimension, and contrast. This interaction becomes essential for enhancing visual interest, grabbing attention, and directing the viewer’s gaze throughout the artwork.

Texture and Brushwork

In such art, texture and brushwork are crucial because they add visual appeal and tactile aspects. Stippling, hatching, and cross-hatching are some of the techniques used by artists to produce a variety of textures and patterns using a single color. This painstaking method improves the artwork’s overall composition and adds levels of complexity.

The Art of Tonal Variation

The foundation of monochrome art is tonal diversity. To generate a wide range of tones within a single color, artists use a variety of techniques, such as mixing, layering, and glazing. The artist can add depth, highlights, and shadows with these minute changes in saturation and value, which eventually gives the piece of art life.

The Impact of Monochromatic Art

Throughout the decades, well-known painters have embraced monochromatic art, which has a long history. East Asian ink-wash painting techniques, such as sumi-e in Japan and literati painting in China, are one prominent example. These artistic practices emphasize the potency of monochromatic expression and have had a significant impact on the field of art.

Symbolism and Metaphorical Interpretations

Monochromatic artwork frequently has symbolic and metaphorical meanings. Artists can give their work a deeper meaning by limiting their color palette to just one. Black and white photography, for instance, might depict the duality of life, but the color red may denote danger or desire. These symbolic connections strengthen the story and impact of hue-centric artworks even more.

Evoking Emotions and Provoking Thoughts

Strong emotions and introspection can be evoked in viewers through the use of monochromatic paintings. A direct and potent connection to the audience is possible thanks to the simplicity and emphasis of a single color. Such art has the power to evoke strong emotions and provoke deep contemplation, whether it’s a sad grey piece that inspires reflection or a fiery red composition that inspires passion and fire.

Contemporary Expressions

Monochromatic art is anchored in tradition yet continues to change and adapt to modern styles. In order to produce captivating monochromatic works, artists are continuously pushing the envelope and experimenting with new methods and materials. Single-tone compositions can be interpreted in novel and fascinating ways thanks to innovations like fusing several media, including unusual textures, and experimenting with alternative printing techniques.

Digital Monochromatic Art

Digital technology has opened up new options for the production of monochrome art. With the incredible flexibility of overtones, textures, and lighting effects that digital tools provide, artists may produce detailed and fascinating monochromatic works of art. Also, the ease with which artists may communicate and disseminate their works in the digital sphere increases the audience for monochromatic art and its accessibility.

Pushing Boundaries in the Modern Art World

In the field of contemporary art, monochromatic works of art continue to defy expectations and push boundaries. To rethink the potential of monochromatic expression, artists are experimenting with unusual materials, conceptual techniques, and interactive installations. This way, they add to the continued development and relevance of chromatic harmony in modern culture.

Examples of Monochromatic Art

Monochromatic art is a tribute to the immense impact that one color can have within the wide tapestry of artistic expression. There are many well-known examples that each provide a distinctive examination of the aesthetic possibilities present in this intriguing style:

  • “Black Square” by Kazimir Malevich: An iconic masterpiece of the 20th century, this monochromatic painting features a perfect square rendered solely in deep black. Malevich’s bold declaration of pure form and the rejection of representational art revolutionized the artistic landscape;
  • “Blue Monochrome” by Yves Klein: With an intense shade of blue as its sole protagonist, Klein’s work immerses viewers in a transcendent experience. Through his patented “International Klein Blue” pigment, he created a vast expanse that seems to evoke the infinite;
  • “White Painting” by Robert Rauschenberg: Challenging the traditional boundaries of art, Rauschenberg presented a series of monochromatic white canvases. These blank surfaces invite contemplation, encouraging viewers to reflect on the very essence of artistic creation;
  • “Yellow Series” by Mark Rothko: Rothko’s abstract expressionist masterpieces often employed a monochromatic palette. In his Yellow Series, vibrant hues of yellow envelop the canvas, creating an immersive and emotive experience that transcends mere color;
  • “White on White” by Kasimir Malevich: Demonstrating the artist’s exploration of pure abstraction, this monochromatic composition features delicate shades of white layered upon one another. Through subtle variations in tone and texture, Malevich creates a visually captivating work of simplicity and depth;
  • “Red on Maroon” by Mark Rothko: Another notable work by Rothko, this monochromatic composition delves into the depths of red. Layer upon layer of the same hue creates a mesmerizing interplay of color and emotion, drawing viewers into an introspective realm.

Red on Maroon” by Mark Rothko, 1959

These well-known examples of monochromatic art demonstrate the ability of a single color to capture the eye and elicit strong feelings. These pieces of art serve as a reminder of the seemingly endless possibilities that arise when artists embrace the solitary emphasis of a hue, from the stark simplicity of black or white to the immersive experiences offered by brilliant blues and yellows.

These artists encourage us to go into the depths of artistic expression in the field of monochromatic art through their mastery of color, texture, and composition.

Appreciating Monochromatic Art

It is important for viewers to spend time analyzing and interpreting the intricacies of single-color art in order to truly enjoy it. Understanding the artist’s intentions and the piece’s emotional impact requires close attention to the tonal variations, brushstrokes, and play of light and shadow. Each line and texture has a purpose and adds to the overall story.

The Role of Perception & Personal Experience

The appreciation of monochrome art is significantly influenced by perception and individual experience. When interacting with art, each spectator brings their own experiences, feelings, and views. As monochromatic art is so straightforward, it enables individual interpretations and fosters a closer, more personal relationship between the observer and the piece.

Engaging with Monochromatic Art

Viewers can ponder the tone, symbolism, and feelings a piece of monochrome art produces in order to interact with it meaningfully. To better understand the artist’s talent and vision, they can investigate the technical elements of the artwork, such as the brushstrokes or the use of textures. Viewers can develop a deep connection with the artwork and reveal its levels of significance by actively engaging with it.

Conclusion

The simplicity of monochromatic art and its capacity to arouse strong emotions through the use of a single hue are its fundamental qualities. Monochromatic painting has a strong effect on viewers and continues to attract and inspire artists thanks to efficient approaches that accentuate light and shadow. This art form pushes boundaries and provides a distinctive visual experience, whether through historical traditions or current manifestations.

Viewers can uncover the beauty of such art and learn more about its emotional and aesthetic value by looking at, interpreting, and interacting with it.

Share

By

What Is a Curator In Art

Posted on 3 min read 68 views

The management and organization of art collections in museums, galleries, and other art-related institutions fall under the responsibility of a professional known as an art curator. Their job includes researching and acquiring artworks, developing exhibitions, interpreting and preserving art, and providing educational programs to the public.

Art curators collaborate with artists, collectors, and other art professionals to create exhibitions that captivate and motivate the audience. They are also in charge of supervising the conservation and preservation of art objects to ensure they are stored and exhibited appropriately.

Additionally, the art curator’s expertise and reputation hold great significance in the art market as they can impact the value and recognition of an artist’s work. Below, you’ll find more information about the role of an art curator, where they originate from, and their main tasks.

The Role Of An Art Curator

The art curator plays a crucial and fundamental role in the art industry, primarily responsible for presenting art collections, which are vital in enriching society and culture. Using their expertise and creative vision, they significantly influence and shape the public’s perception of art. By developing visually engaging and educational displays, they enhance the experience of viewing art, making it more meaningful and impactful.

In addition, curators provide a great platform for rising, talented artists to exhibit their work and gain recognition. Without the paramount role of curators, the art and cultural heritage that add value and significance to our lives would be at risk of being lost.

Main Tasks Of An Art Curator

We briefly discussed who an art curator is and what is the importance of their work. Now, it’s time to talk in more detail about what they do and define their main tasks.

  • The main tasks of an art curator involve managing and organizing art collections in museums, galleries, and other cultural institutions. Curators have the responsibility of researching, selecting, and procuring artworks for their collections. They also develop exhibitions that showcase the artwork in a compelling and informative manner;
  • Another one of their major duties involves interpreting and safeguarding artworks to guarantee that they remain accessible to the public and adequately maintained for future generations;
  • Furthermore, curators work together with artists, collectors, and other professionals in the art industry to establish connections and develop significant programs and events;
  • They are also responsible for managing the logistics related to the collection, which comprises documentation, storage, and transportation;
  • Developing educational programs that involve and encourage the public and cultivate an appreciation for the arts is also a crucial responsibility of curators. Through offering context and interpretation, curators assist in making art comprehensible and significant to a wide range of people.

The Origins Of Art Curation

The inception of art curation dates back to the 18th century when private collectors commenced showcasing their art collections publicly. These initial exhibitions were typically arranged by the collectors themselves, who exhibited their collections in their homes or rented spaces. As public exhibitions grew in popularity, the role of the curator emerged as a professional position dedicated to organizing and managing art collections. The 19th century witnessed the emergence of museums and art galleries, leading to an increased need for curators capable of managing these institutions and their collections. Over the course of the 20th century, their role continued to evolve with the introduction of innovative technologies and interdisciplinary methods to curatorial practice.

Today, curators are a critical component of the art world, responsible for managing and organizing collections, creating exhibitions, and promoting public engagement with art. The origins of art curation highlight the enduring significance of art and the efforts of those who work to preserve and share it with the world.

Summing Up

We can all agree that art curators are essential figures in the art world, tasked with the crucial responsibility of managing and organizing art collections. They play a key role in developing exhibitions, creating educational programs, and promoting public engagement with art. Without their efforts, the appreciation and understanding of art would be greatly diminished, highlighting the importance of the invaluable contributions made by art curators.

Share

By

What Does Movement Mean in Art? The Meaning of Movement in Art

Posted on 9 min read 71 views

Movement in art is a broad concept that involves the suggestion or illusion of physical motion through various artistic techniques and elements. It is a fundamental aspect of visual perception that helps to establish relationships, evoke emotions, and create narrative or symbolic significance in works of art. This discussion will explore the different types of movement, how artists use it, and its overall significance in art.

Types of Movement in Art

There are two main types of movement in art: actual and implied.

Actual Movement

Jean Tinguely. Fragment from Homage to New York. 1960

Actual movement in art entails the incorporation of physical motion within an artwork, commonly observed in the realm of kinetic art. This artistic expression often encompasses artworks that possess the ability to move autonomously or have been intentionally designed to be set in motion, showcasing the dynamic interplay between aesthetics and kinetic energy. Prime examples of actual movement in art can be witnessed through:

  • Captivating installations;
  • Interactive sculptures;
  • Mesmerizing mobiles.

These artistic forms blur the boundaries between static visual form and captivating kinetic action, offering viewers an immersive and engaging experience.

Implied Movement

Vincent van Gogh. Starry Night. 1889

Implied movement in art involves the artist suggesting a sense of motion within the artwork, even though it doesn’t physically occur. This captivating effect can be achieved through a range of visual cues and techniques, including:

  • Gestural lines;
  • Strategic repetition;
  • Skillful manipulation of perspective.

These artistic elements work in harmony to create the illusion of movement, engaging the viewer’s imagination and infusing the artwork with dynamic energy. A remarkable illustration of implied movement can be witnessed in Vincent van Gogh’s iconic masterpiece “Starry Night,” where the swirling skies and expressive brushstrokes evoke a sense of motion and turbulence, transporting viewers into a mesmerizing nocturnal realm.

Techniques for Depicting Movement in Art

Artists use a range of techniques to depict movement in their work. Here are some of the most common methods:

Diagonal Lines

Marcel Duchamp. Nude Descending a Staircase, No. 2. 1912

Diagonal lines, with their inherent sense of instability and movement, play a significant role in the art to imply motion. They can guide the viewer’s eye and create a compelling sense of direction or dynamic energy within the artwork. Key points about the use of diagonal lines in art include:

  • Implying movement through their inherent sense of instability;
  • Guiding the viewer’s eye along a specific path;
  • Creating a sense of direction or kinetic flow within the composition.

When strategically incorporated into paintings or sculptures, diagonal lines add a dynamic element that enhances the visual impact and engages the viewer in a captivating visual journey.

Repetition and Pattern

Repetition and pattern in art can be powerful tools for suggesting movement, as they create a rhythmic and dynamic visual effect. Key aspects of repetition and pattern in relation to implying movement in art include:

  • The deliberate repetition of shapes, lines, or colors within an artwork;
  • Generating a sense of motion and energy through repeated elements;
  • Creating a rhythmic visual flow that engages the viewer’s perception.

By skillfully employing repetition and pattern, artists can infuse their compositions with a captivating sense of motion, adding a dynamic and energetic quality to the overall artistic experience.

Perspective and Foreshortening

Andrea Mantegna. Lamentation over the Dead Christ. 1483

Perspective and foreshortening are essential techniques used by artists to create a sense of depth and motion within their artworks. Key points about the role of perspective and foreshortening in implying movement include:

  • Altering the size and positioning of objects to create a realistic spatial illusion;
  • Conveying a sense of depth and dimension that enhances the perception of motion;
  • Engaging the viewer by creating a dynamic visual experience.

An exemplary illustration of perspective and foreshortening can be observed in Andrea Mantegna’s masterpiece, “Lamentation over the Dead Christ.” Through the careful manipulation of perspective, Mantegna skillfully portrays the figures and scenes in a way that adds depth and a dynamic quality to the composition. The deliberate foreshortening of certain elements intensifies the sense of movement, inviting viewers to emotionally connect with the mournful scene.

Contrasting Colors and Values

Contrasting colors and values in art play a crucial role in creating a sense of dynamism and movement. Key points about the use of contrasting colors and values to imply movement include:

  • Utilizing bright and contrasting colors or values to enhance visual impact;
  • Creating a visual effect where certain elements appear to advance toward the viewer;
  • Generating an illusion of movement and energy within the artwork.

By strategically employing contrasting colors and values, artists can establish a dynamic interplay between different elements, resulting in a heightened sense of visual motion. This technique captivates the viewer’s attention and adds a vibrant and lively quality to the composition, making the artwork visually engaging and evoking a sense of dynamic movement.

Blur and Distortion

Blur and distortion are artistic techniques that can effectively suggest movement by mimicking the visual appearance of objects in motion. Key points about the use of blur and distortion to imply movement include:

  • Employing blur and distortion to recreate the visual effects observed when objects are in motion;
  • Creating a sense of dynamic energy and vitality within the artwork;
  • Frequently utilized in photography, but also found in painting.

Artists skillfully employ blur and distortion to evoke a sense of movement and capture the fluidity of a subject or scene. Whether through intentional blurring of lines, smudging of colors, or deliberate distortions, these techniques add an element of dynamism and visual excitement to the artwork. 

The Significance of Movement in Art

Movement in art serves several functions and holds significant importance in conveying meaning. Here are some reasons why it is pivotal:

Guiding Viewer’s Eye

Movement can guide the viewer’s gaze around the artwork, directing attention to important elements or helping to tell a story.

  • Creating Mood and Emotion: Movement can create various moods and evoke emotions. For example, calm, horizontal lines can create a sense of peace, while chaotic, diagonal lines can evoke feelings of tension or excitement;
  • Establishing Narrative: In historical and narrative art, movement can be used to depict action and events, enhancing the storytelling aspect of the artwork;
  • Expressing Symbolic Meaning: Movement can also be symbolic. For example, the upward movement might symbolize freedom or aspiration, while the downward movement could signify downfall or depression.

The following table provides examples of artworks that embody the concept of movement:

ArtworkArtistType of MovementTechnique Used
Starry NightVincent Van GoghImpliedDiagonal Lines, Repetition
Bird in SpaceConstantin Brâncuși ImpliedSmooth Lines
MobilesAlexander CalderActualKinetic Art
Lamentation over the Dead ChristAndrea MantegnaImpliedRepetition, Blur
Broadway Boogie WoogiePiet MondrianImpliedRepetition and Pattern
Hard TimesL.S LowryImpliedRepetition, Perspective
Nude Descending a Staircase, No. 2Marcel DuchampImpliedDiagonal Lines, Repetition, Distortion

Movement in Different Art Movements

The concept of movement has been a focal point in several art movements throughout history:

Futurism

Futurism, an art movement originating in Italy in the early 20th century, emerged as a celebration of technology, speed, and dynamism. Key points about Futurism and its portrayal of movement include:

  • Embracing the energy and movement of the modern world;
  • Characterized by a fascination with speed, technology, and progress;
  • Futurist artists frequently employed techniques such as repetition and distortion to suggest motion and convey a sense of speed.

Futurism captured the essence of a rapidly changing society and sought to depict the dynamic nature of the modern era. Through the use of repetitive elements and distortions, Futurist artists aimed to convey a visual representation of movement and velocity.

Impressionism

Impressionism, a prominent art movement, emerged with a focus on capturing the ephemeral qualities of light and color. Key points about Impressionism and its portrayal of movement include:

  • Seeking to depict the fleeting effects of light and color;
  • Implying movement through the depiction of changing landscapes and scenes of modern life;
  • Utilizing loose brushwork and vibrant color contrasts to suggest the passage of time and the dynamic interplay of light and shadow.

Impressionist artists embraced a more spontaneous and subjective approach, aiming to convey the transient nature of their subjects. The Impressionists captured scenes of bustling streets, serene landscapes, and leisure activities, infusing their artworks with a sense of liveliness and capturing the essence of movement in a vivid and evocative manner.

Abstract Expressionism

Abstract Expressionism, a significant art movement that emerged in the mid-20th century, was characterized by artists such as Jackson Pollock who employed gestural brushwork and spontaneous, energetic techniques. Key points about Abstract Expressionism and its portrayal of movement include:

  • Utilizing gestural brushwork and energetic techniques to express emotion and the act of painting itself;
  • Artists like Jackson Pollock created “drip paintings” that embody the energy and movement of their painting process;
  • Emphasizing the physicality and dynamic gestures involved in the creation of the artwork.

Abstract Expressionist artists, including Jackson Pollock, sought to convey emotion and raw energy through their artworks. Pollock’s renowned “drip paintings” exemplify this approach, as he poured, dripped, and splattered paint onto the canvas, capturing the spontaneous movements and gestures involved in the act of painting. These artworks embody a sense of motion and vitality, evoking a visual representation of the artist’s energy and the dynamic process of creation.

Op Art

Op Art, short for “Optical Art,” emerged as a movement that aimed to create optical illusions suggesting movement. Key points about Op Art and its portrayal of movement include:

  • Focusing on the creation of optical illusions through precise, geometric patterns;
  • Artists like Bridget Riley utilized these patterns to evoke a sense of movement in their artworks;
  • Op Art pieces often appeared to vibrate, pulse, or give the impression of motion.

Op Art artists, such as Bridget Riley, meticulously crafted their artworks with precise geometric patterns and contrasting colors. These carefully arranged elements produced visual effects that played tricks on the viewer’s perception, creating the illusion of movement. Through the skillful manipulation of optical techniques, Op Art artists conveyed a sense of energy and visual motion, resulting in visually striking and immersive artworks.

Kinetic Art

Kinetic Art, a dedicated movement, revolved around the incorporation of actual physical movement in artworks. Key points about Kinetic Art and its portrayal of movement include:

  • Artists like Alexander Calder and Jean Tinguely created sculptures that embraced movement;
  • Movement in Kinetic Art could be achieved through natural forces such as wind or mechanical means;
  • Kinetic artworks captivate viewers with their dynamic and ever-changing nature.

Kinetic artists, such as Alexander Calder and Jean Tinguely, were pioneers in creating sculptures that were designed to move. Whether activated by natural forces like wind or driven by mechanical mechanisms, these artworks brought an element of motion and vitality to the artistic experience.

The dynamic and ever-changing nature of Kinetic Art captivates viewers, inviting them to witness the mesmerizing interplay between the artwork and its surroundings. Through their innovative use of movement, Kinetic artists redefined the boundaries of traditional art forms, showcasing the inherent beauty and poetic qualities of physical motion.

Performance Art

Performance Art is an art form that encompasses the movement of the artist’s body in space and time, placing emphasis on the process and action rather than the final product. Key points about Performance Art and its exploration of movement include:

  • Artists like Marina Abramović utilize their bodies as a medium of expression;
  • Performance Art focuses on themes such as endurance, presence, and vulnerability;
  • Movement in Performance Art involves the physicality and gestures of the artist.

In Performance Art, the artist’s body becomes a vital element of the artwork, engaging in direct and visceral interaction with the audience. Artists like Marina Abramović push the boundaries of their endurance, creating powerful and thought-provoking performances that explore the human experience. Performance Art invites viewers to witness the transformative power of live actions, offering a unique and ephemeral artistic encounter that blurs the line between artist and audience.

Conclusion

movement is a fundamental element in art that has been explored and manipulated by artists across cultures and eras. It is an essential tool for guiding the viewer’s eye, establishing a narrative, creating emotion, and expressing symbolic meanings. Whether physical or implied, the use of movement enhances the viewer’s engagement with the artwork, making it a vital aspect of artistic expression. As viewers, understanding the concept of movement allows us to better appreciate the depth and complexity of the artworks we encounter.

Share

By

How to Make 3D Drawings: A Comprehensive Guide

Posted on 4 min read 87 views

Drawing is an art form that allows us to express our creativity and skill. One of the more advanced techniques is 3D drawing, which can make flat images look as though they’re leaping off the page. Let’s dive into the comprehensive guide on how to make 3D drawings.

Understanding the Basics of 3D Drawings

3D drawing is a technique that gives a three-dimensional effect to your drawings. It involves understanding and applying the principles of perspective, shading, and proportions. It’s all about tricking the human eye into believing that a 2D image has depth.

Perspective

By manipulating perspective, artists can create a sense of depth and distance, effectively guiding the viewer’s gaze toward specific focal points within the artwork. The careful use of vanishing points and proportional scaling adds a sense of realism, immersing the observer in the three-dimensional world depicted on a two-dimensional surface.

Shading

Shading techniques involve the careful manipulation of light and dark values to render:

  • Volume;
  • Texture;
  • Form in a drawing.

By strategically applying shadows and highlights, artists can create a sense of three-dimensionality, adding depth and realism to their artwork.

Proportions

Proportions play a vital role in creating believable 3D drawings. They determine the relationships in size between different parts of an object, ensuring its visual coherence and accuracy. By accurately capturing and representing proportions, artists can achieve a sense of realism and maintain the integrity of the depicted subject.

Materials Needed for 3D Drawings

MaterialDescription
Graphite PencilsThese are your primary tools for sketching and shading. Get a variety of hardness levels, ranging from hard (H) to soft (B).
ErasersA kneaded eraser is useful for lightening areas of shading, while a rubber eraser is great for completely removing lines.
PaperFor beginners, standard sketchbook paper is fine. As you progress, you might want to explore different types of drawing paper.
Rulers and Geometry SetThese tools help you make precise lines and angles.
Blending ToolsA blending stump, cotton swabs, or even your finger can be used to blend graphite for a smooth, realistic look.
Colored Pencils (optional)If you want to create colored 3D drawings, a set of colored pencils is necessary.

Step-by-Step Guide to Creating a 3D Drawing

1. Choose and Understand Your Subject

  • Choose a simple object for your first 3D drawing, like a cube or a cylinder;
  • Look at the object from different angles and observe how its appearance changes;
  • Notice where the light source is and where shadows fall.

2. Begin Sketching Your Object

  • Draw the outline of your object. For a cube, start with a square;
  • Add the lines for perspective. For a cube, draw three lines extending from each of the three visible corners of your square. Make sure these lines are going toward the same direction as if they’re meeting at a far-off point (the vanishing point);
  • Complete the cube by drawing another square, connecting the ends of the perspective lines.

3. Add Shading

  • Determine where your light source is coming from;
  • The side of the object that is facing the light source will be the lightest. The side opposite will be the darkest (shadow);
  • Start shading from the darkest area to the lightest, using different pencils for different levels of darkness.

4. Refine Your Drawing

  • Adjust your shading as needed. Use an eraser to lighten areas if needed, or add more graphite to darken them;
  • Add reflective light. This is a lighter area on the shadow side of the object where light is bouncing back from the surrounding environment;
  • Use a blending tool to smooth out the shading and eliminate visible lines.

5. Finalize Your 3D Drawing

  • Review your drawing from a distance. This can help you see any issues with proportion or shading that you may not notice up close;
  • Make any necessary corrections;
  • Sign your work. Congratulations, you’ve completed your first 3D drawing.

Advanced Techniques for 3D Drawing

As you get more comfortable with the basics, you can start to explore more advanced 3D drawing techniques:

Multiple Point Perspective

Multiple-point perspective techniques, such as two-point or three-point perspective, are employed in more complex drawings to accurately represent objects with varying angles and orientations. These methods expand upon the simple one-point perspective used for basic shapes like cubes, allowing artists to create intricate compositions with realistic depth and spatial complexity.

Contour Lines

Contour lines are instrumental in capturing the form and shape of an object, as they elegantly trace its contours and curves. These lines dynamically follow the object’s contours, aiding in conveying its three-dimensionality even in the absence of shading.

Complex Shading Techniques

As your skills progress, you can delve into the realm of more intricate shading techniques, including:

  • Cross-hatching;
  • Stippling;
  • Various others.

These advanced methods offer a greater level of detail and texture to your drawings, allowing you to achieve nuanced effects and refine the overall visual impact.

Color

Adding color to your 3D drawings can enhance their realism and visual impact. It’s important to understand that different colors can interact with light and shadow in unique ways, affecting the overall perception of depth and form.

Tips and Tricks for Effective 3D Drawings

Tips and Tricks for 3D Drawings

Tips and TricksDescription
Practice RegularlyLike any skill, the more you practice, the better you’ll get. Make drawing a daily habit.
Use Reference ImagesIf you’re drawing something complex, having a reference image can be very helpful.
Be PatientDon’t rush the process. Quality 3D drawings take time and patience.
Learn from OthersLook at other 3D drawings and learn from them. You can also take classes or watch tutorials online.
Experiment
Don’t be afraid to try different techniques, tools, or subjects. You might discover a new style that you love.

Conclusion

3D drawing is a challenging yet rewarding skill that can take your artistic abilities to the next level. It’s all about understanding perspective, mastering shading techniques, and ensuring correct proportions. Remember, practice makes perfect. The more time you invest in honing your skills, the more life-like and detailed your 3D drawings will become. So, pick up your pencil and start creating!

Share

By