International

Emphasis in Art: A Visual Journey

Posted on 7 min read 166 views

Art possesses an inherent ability to express thoughts, emotions, and perspectives in a compelling manner. Within the domain of visual arts, emphasis assumes a pivotal role in guiding the observer’s focus and generating a profound effect. By grasping the concept of emphasis, artists can manipulate various design elements and principles to steer the viewer’s gaze, convey their intended message, and evoke specific sentiments. In this discourse, we shall delve into the essence of emphasis in art, examine its profound significance, and scrutinize the diverse techniques employed by artists to imbue their creations with emphasis.

Comprehending Emphasis

Emphasis stands as a fundamental principle within the realm of art, encompassing the strategic utilization of visual techniques to accentuate particular elements, regions, or facets within an artwork. Through the application of emphasis, artists can skillfully direct the observer’s attention, establish a visual hierarchy, and augment the overall impact and significance of their artistic endeavors. This article aims to provide a comprehensive comprehension of emphasis, delving into its significance, techniques, and implications in the expansive world of art.

Importance of Emphasis

Emphasis holds immense significance in the realm of art, enabling artists to effectively express their intentions, direct the viewer’s interpretation, and convey the central message or theme of their creations. By accentuating specific elements, artists can establish focal points, instill visual tension, and maintain control over the narrative within the artwork. Emphasis aids in organizing the composition, drawing attention to particular details, and enriching the overall visual encounter for the viewer.

Methods for Establishing Emphasis

Artists employ a range of techniques to generate emphasis in their artwork. These techniques encompass:

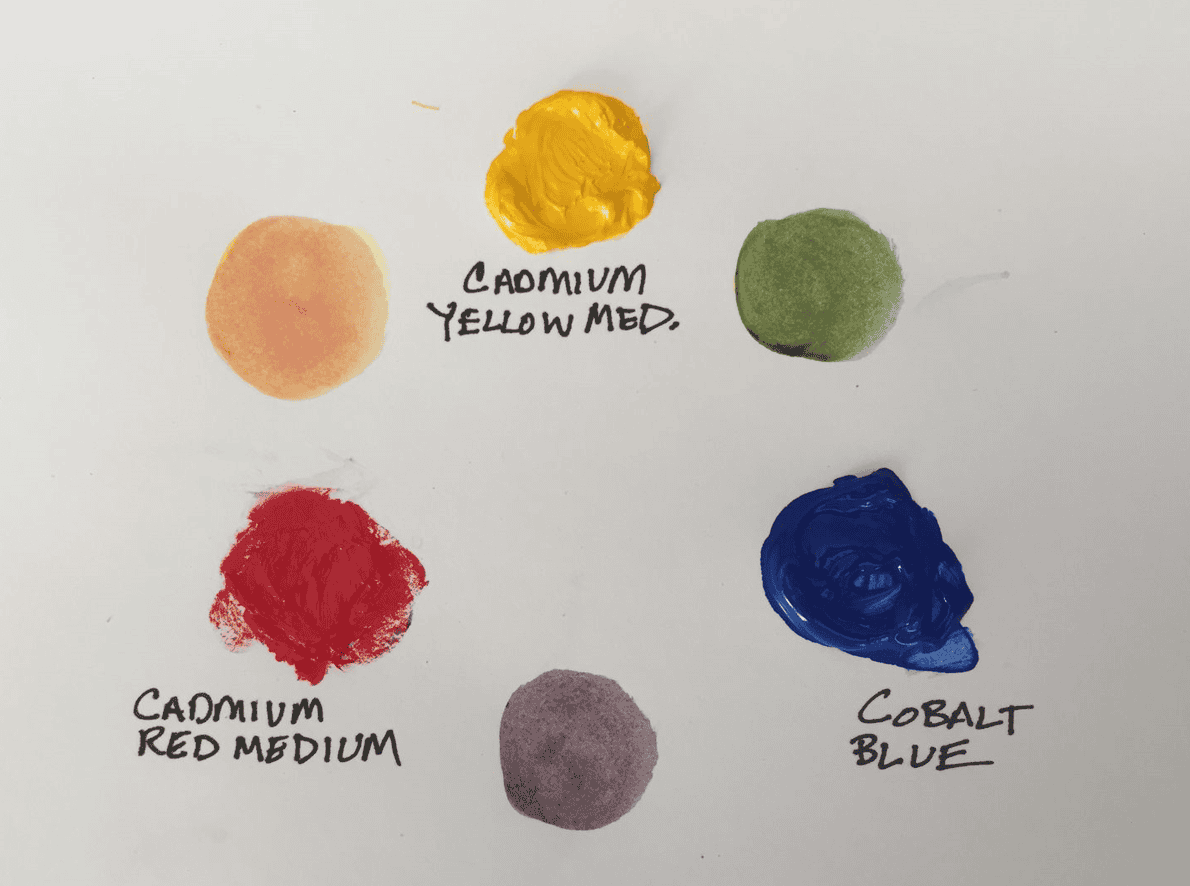
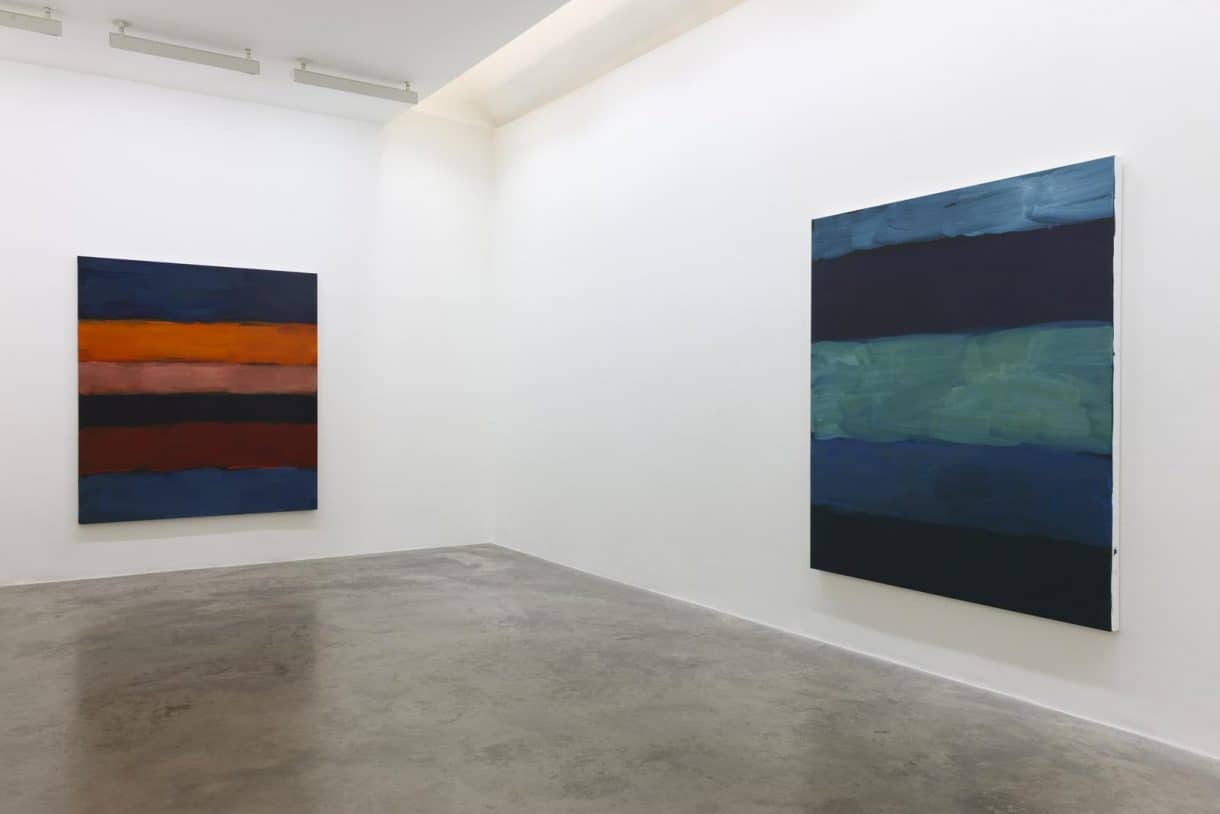
  1. Contrast: Utilizing differences in color, value, shape, size, texture, or other visual elements to create a noticeable distinction between the emphasized element and the surrounding elements;
  2. Placement: Strategically positioning the emphasized element within the composition to ensure it occupies a prominent or central location, making it more visually commanding;
  3. Isolation: Separating the emphasized element from the rest of the composition by using negative space or framing techniques, which draw attention to its uniqueness and significance;
  4. Scale and Proportion: Employing variations in scale and proportion to make the emphasized element larger, smaller, or more exaggerated compared to other elements, thereby increasing its visual impact;
  5. Focus and Depth of Field: Manipulating focus and depth of field to create a sharp, clear focus on the emphasized element while allowing other elements to appear blurred or less defined;
  6. Repetition and Rhythm: Repeating certain visual elements, patterns, or motifs to emphasize their presence and create a sense of rhythm or visual harmony within the artwork.

Implications of Emphasis

Emphasis has several implications in art, both in terms of aesthetics and storytelling. Some of these implications include:

Directing Attention

Artists utilize various techniques to direct the viewer’s attention within their artwork, strategically guiding their gaze towards specific areas or elements. Emphasis is a powerful tool that enables artists to control the viewer’s visual journey and ensure that their eyes are drawn to particular focal points. This can be achieved through the implementation of composition techniques, such as the placement of elements, use of color, contrast, and scale.

Techniques for Directing Attention

TechniqueDescription
PlacementStrategic positioning of elements to create a visual hierarchy
ColorUse of vibrant or contrasting colors to draw attention
ContrastVariation in tones, textures, or shapes to create visual interest
ScaleManipulating the size of elements to create emphasis
Leading linesUtilizing lines to guide the viewer’s gaze towards specific areas
Point of focusEstablishing a central point of interest that demands attention

Directing attention in artwork is crucial for artists to convey their intended message effectively. By employing techniques that create emphasis, artists can guide the viewer’s eye and ensure they focus on specific areas or elements within the artwork, allowing for a controlled and engaging visual experience.

Establishing Hierarchy

In the creation of artwork, establishing a visual hierarchy is essential for artists to communicate the relative importance or significance of different elements within the composition. This is achieved by emphasizing certain elements over others, effectively guiding the viewer’s understanding and interpretation of the artwork.

Techniques for Establishing Hierarchy

TechniqueDescription
SizeVarying the size of elements to indicate their importance or dominance
PlacementStrategic positioning to create a sense of hierarchy and visual flow
ColorUsing color to differentiate and prioritize elements
ContrastCreating contrast through light and dark values to draw attention
DetailFocusing on specific details to highlight their significance
TypographyUtilizing different fonts, sizes, and styles for text-based elements

Establishing hierarchy in artwork is crucial for artists to effectively communicate the importance and relationships between different elements. By utilizing techniques such as size, placement, color, contrast, detail, and typography, artists can create a visual hierarchy that guides the viewer’s perception and enhances their understanding of the artwork.

Enhancing Meaning

Emphasizing specific elements within an artwork serves a deeper purpose by enriching the meaning and symbolism conveyed. By highlighting certain elements, artists can imbue them with significance, representing key themes, ideas, or emotions that contribute to the overall message of the artwork.

Techniques for Enhancing Meaning

TechniqueDescription
SymbolismUsing symbolic representations to convey abstract or complex ideas
MetaphorEmploying metaphors to evoke specific emotions or concepts
IconographyIncorporating culturally significant symbols or imagery
CompositionArranging elements in a deliberate manner to reinforce the intended meaning
NarrativeTelling a story or depicting a sequence of events to convey meaning
ContrastEmploying contrasting elements to evoke tension or highlight juxtaposition

Emphasizing specific elements in artwork goes beyond mere aesthetics and serves to enhance the meaning and symbolism portrayed. Through techniques like symbolism, metaphor, iconography, composition, narrative, and contrast, artists can deepen the emotional and conceptual impact of their work, allowing viewers to engage with the artwork on a more profound level.

Creating Impact

Emphasis plays a vital role in the creation of powerful and impactful visual experiences within artwork. By skillfully applying emphasis, artists can capture the viewer’s attention and leave a lasting impression. This ability to create impact is achieved through various techniques that draw the viewer’s focus and evoke strong emotional responses.

Techniques for Creating Impact

TechniqueDescription
ContrastUtilizing stark contrasts to create visual tension and grab attention
ScaleManipulating the size of elements to create a sense of grandeur or intensity
ColorEmploying bold or vibrant colors to evoke strong emotions and stimulate senses
CompositionArranging elements in a dynamic or unconventional manner to create intrigue
TextureIncorporating textured surfaces to add depth and tactile interest
MovementDepicting dynamic or kinetic elements to evoke a sense of energy and action

Emphasis is a powerful tool that enables artists to create impactful visual experiences that resonate with viewers. By employing techniques like contrast, scale, color, composition, texture, and movement, artists can capture attention, evoke strong emotions, and leave a lasting impression on the viewer’s mind. This ability to create impact enhances the overall effectiveness and memorability of the artwork.

Emphasis is a vital technique in the realm of art that enables artists to effectively communicate their intentions, guide the viewer’s perception, and enhance the overall impact of their work. By employing various techniques such as contrast, placement, isolation, scale, and proportion, artists can create a visual hierarchy, direct attention, and convey meaning within their compositions. Emphasis adds depth, intrigue, and visual engagement to art, enriching the viewer’s experience and facilitating a deeper understanding and appreciation of the artist’s message.

Importance of Emphasis in Art

Emphasis plays a crucial role in the world of art, serving several key purposes that enhance the overall impact and effectiveness of a piece. Here are some reasons why emphasis is essential:

  • Directing the Viewer’s Attention: Emphasis allows artists to take control of the viewer’s gaze, guiding them towards specific elements or areas within the artwork. By strategically placing emphasis, artists can ensure that the viewer focuses on the most significant aspects, effectively conveying their intended message and creating a sense of visual flow;
  • Creating Visual Impact: Emphasizing certain elements adds visual interest and impact to a composition. By drawing attention to specific areas, artists can create focal points that captivate the viewer’s gaze and evoke a sense of drama, dynamism, or intrigue. This visual impact enhances the overall composition and leaves a memorable impression on the viewer;
  • Conveying Meaning and Emotion: Emphasis is a powerful tool for artists to communicate meaning, emotions, narratives, and themes. By emphasizing specific elements, artists can convey their intended message more effectively, whether it’s expressing a particular emotion, telling a story, or exploring deeper themes. Through emphasis, artists can evoke specific feelings and engage the viewer on an emotional level.

Emphasis is of utmost importance in art. It allows artists to direct the viewer’s attention, create visual impact, and convey meaning and emotion. By skillfully employing emphasis, artists can enhance the overall effectiveness and resonance of their artwork, ensuring a captivating and meaningful experience for the viewer.

Conclusion

Emphasis is a fundamental concept in art that allows artists to direct the viewer’s attention and create impact within their works. By employing various techniques such as contrast, color, scale, and placement, artists can emphasize specific elements or areas, thereby conveying meaning, evoking emotions, and enhancing the overall visual appeal. Through the skillful use of emphasis, artists can guide the viewer’s gaze, tell a compelling story, and leave a lasting impression.

Whether it’s through the bold contrast of light and dark, the vibrant hues that ignite emotions, or the strategic placement of focal points, emphasis breathes life into artworks and transforms them into powerful and engaging experiences. It is through the intentional use of emphasis that artists harness the potential to create art that resonates deeply with viewers, capturing their attention and inviting them on a visual journey that lingers in their minds long after they have encountered the artwork.

FAQS

Can emphasis be created using multiple techniques simultaneously?

Yes, artists often combine different techniques to create a stronger sense of emphasis. For example, they may use contrast in color, scale, and placement to draw attention to a specific element.

Does emphasis always have to be on a single element?

No, emphasis can be placed on multiple elements or areas within an artwork. The key is to create a visual hierarchy that guides the viewer’s gaze effectively.

How does emphasis affect the overall composition of an artwork?

Emphasis helps in organizing the composition and creating a focal point. It adds structure, balance, and depth to the artwork, enhancing its visual appeal.

Are there any guidelines for using emphasis in art?

While there are no rigid rules, artists should consider the intended message, emotions, and impact they want to achieve when employing emphasis. Experimentation and personal expression play a significant role in determining how emphasis is utilized.

Share

By

What Is a WIP in Art?

Posted on 2 min read 195 views

In the world of art, the term “WIP” stands for “work in progress.” It refers to an artwork that is still being created or developed, rather than being considered a finished piece. WIPs can take many forms, including paintings, sculptures, drawings, digital artwork, and more.

WIPs serve as a window into the artistic process, allowing viewers to witness the evolution and transformation of the piece over time. They provide insights into an artist’s techniques, choices, and challenges. Sharing WIPs allows artists to engage with their audience, receive feedback, and build a community around their art.

Here are some key points about WIPs in art:

  • Purpose: WIPs offer a glimpse into the artist’s decision-making, experimentation, and refinement. They document the artistic journey and showcase the progress made;
  • Visual Representation: Artists often share WIPs through photographs or videos. These visual representations capture the artwork at different stages, from initial sketches to final details, showcasing the sequential development;
  • Written Descriptions: Alongside visual documentation, artists may provide written descriptions or annotations. These explanations offer insights into artistic choices, challenges faced, and reflections on the progress made;
  • Platforms for Sharing: WIPs can be shared on social media, art forums, or personal websites. Artists choose various platforms to engage with their audience, receive feedback, and build a community around their art;
  • Benefits for Artists: Sharing WIPs allows artists to receive constructive criticism, suggestions, and encouragement. It serves as a personal record of their artistic growth and development;
  • Benefits for Viewers: Following WIPs can be an inspiring and educational experience for viewers. It provides a window into the creative process, enabling them to appreciate the artist’s journey and gain a deeper understanding of the art-making process.

Conclusion

WIPs in art refer to artworks that are still in progress, offering insights into the artist’s creative process and the evolution of the piece over time. Through visual documentation and written descriptions, artists share their work, engage with their audience, and build a community. WIPs provide a valuable opportunity for artists and viewers alike to appreciate the artistic journey and the process of creating art.

Share

By

The Fat Over Lean Rule in Oil Painting: Explained

Posted on 10 min read 75 views

Oil painting is a versatile and popular medium that has attracted artists for centuries. One of the most important rules to understand and follow when working with oil is the “fat over lean” principle. This principle ensures the longevity, flexibility, and overall stability of your oil paintings.

How The Fat Over Lean Rule Works

The “fat over lean” rule refers to the order in which layers of paint are applied to the canvas. It is based on the fact that oil paints consist of pigment particles suspended in a drying oil medium, traditionally linseed oil. The drying oil oxidizes and hardens over time, creating a solid surface. However, improper layering of paint can lead to cracking or other structural problems in a work of art.

Scheme of the effect of oxygen on the layers of the picture

Simply put, the rule of thumb is that each successive coat of paint should contain more oil than the previous one:

  1. Initial coats, known as “lean,” contain less oil and more solvent, making them thinner in consistency. These lean coats provide a firm base and promote adhesion between the paint layers and the support;
  2. As you move toward the top coats, called “fat” coats, the oil content increases, making the paint fatter and fuller in consistency. Oily layers dry more slowly than lean layers, and their increased flexibility prevents cracking. The thick over lean approach allows the painting to deform without stressing the layers below, which increases the longevity of the artwork;
  3. To achieve the “fat over lean” principle, artists can adjust the oil content by adding oil mediums or diluting the paint with solvents. Using oil mediums, such as linseed oil or poppy seed oil, increases the oiliness of the paint. Conversely, solvents such as mineral spirits or turpentine reduce the oil content, making the layers more fluid;
  4. It is very important to watch the drying time between coats, as applying a fat coat on top of a still-lean coat can lead to problems. Waiting for each layer to dry to the touch or using quick-drying mediums can help maintain the integrity of the “fat over lean” approach.

Understanding the “fat over lean” principle is especially important when working in multiple sessions or when using traditional staining techniques. Following this rule ensures that the top layers of paint do not compromise the stability of the lower layers, allowing the painting to age gracefully.

By adhering to the “fat over lean” rule, artists can create oil paintings that not only have vibrant color and rich texture but also stand the test of time. This principle ensures the right balance of oils and solvents in each layer, contributing to the adhesion, flexibility, and longevity of the artwork. Embrace this fundamental rule in your oil painting practice and let it guide you to a mastery that will last for generations to come.

What is lean paint?

In oil painting, lean paint refers to a mixture of oil paints with less oil and more solvent than other layers of paint in an artwork. Oil paint is notable for its thinner consistency and faster drying time.

Rules for using lean paint

When making lean paint, artists usually use more solvents, such as mineral spirits or turpentine, to thin the oil paint. This dilution reduces the amount of oil in the mixture, resulting in a thinner paint layer. As a result, the paint layer dries faster and has a more matte appearance. To do this:

  • Thin coats of paint are often used in the initial stages of oil painting, serving as an undercoat or base coat;
  • They provide a solid base for subsequent coats of paint and create a smooth surface for further work.

By using lean paints in the early stages, artists can define the composition, values, and overall structure of their work.

It is important to note that layers of lean paint should be applied thinly to prevent cracking or other problems as the painting ages. These coats should be stiffer and provide a solid base for subsequent coats, which will have a higher oil content and greater flexibility.

In general, lean paint plays an important role in the fat over lean” rule in oil painting. By starting with lean coats and gradually increasing the oil content in subsequent coats, painters can ensure the stability and durability of their works while achieving the desired effects and textures.

What is fat paint?

In oil painting, fat paint refers to a mixture of oil paint that has a higher oil content and a lower solvent content than lean paint layers.

Features of fat paints:

  • Oily paints have a thicker consistency and a slower drying time;
  • When creating bold paints, artists usually use a higher proportion of drying oils, such as linseed oil or poppy seed oil, to increase the oil content of the mixture. The result is a more viscous layer of paint that retains moisture and takes longer to dry;
  • Bold layers of paint are usually applied in the later stages of an oil painting, layering on top of lean layers that create a firm base. Bold coats are used to give depth, texture, and richness to a work. They can be applied in strokes or with a palette knife, creating an impasto or smooth glaze effect;
  • Higher oil content in fat layers of paint offers several advantages. It increases the flexibility of the paint film, reducing the risk of cracking over time. Oily coats also have a sheen after drying, which increases the visual appeal of the painting. In addition, the increased oil content makes it easier to mix and manipulate paints on the canvas;
  • When using bold coats of paint, consider drying time and interaction with underlying layers. Applying a fat coat on top of a lean coat that has not yet dried can lead to problems such as cracking or poor adhesion. Painters often wait until the underlying layers are dry, or use quick-drying products to ensure proper layering and maintain the “fat over lean” principle.

By strategically placing the right layers of bold colors in oil painting, artists can achieve a variety of effects, from thick and textured impasto to smooth and translucent glazes. These layers contribute to the overall richness, depth, and vibrancy of the artwork, creating a visually arresting result.

Remember that when working with oil paints and related media, proper ventilation and caution are essential. Always follow safety procedures and use proper ventilation to ensure a safe and healthy working environment.

Why follow the fat-over-lean rule?

proportions of oil paint for thick and thin coats

Following the “fat over lean” rule in oil painting is necessary for several reasons. Let’s look at why following this principle is critical to the longevity and stability of your work:

  • Adhesion and stability: The “fat over lean” rule ensures proper adhesion between layers of paint and support (canvas or panel). Thin coats containing less oil and more solvent provide a firm base for subsequent coats. This prevents the top layers from peeling or flaking over time;
  • Flexibility and crack prevention: Oily coats with high oil content dry more slowly and remain more flexible than thin coats. This flexibility allows the paint film to expand and contract without cracking as the environment changes, such as temperature and humidity. By gradually increasing the oil content of each layer, you can adapt the painting to these subtle movements;
  • Managing drying time: Thick layers of paint dry more slowly than thin layers. By following the “fat over lean” rule, you allow each layer to dry sufficiently before applying the next. This helps avoid problems like top coats drying faster than bottom coats, which can cause cracking or adhesion problems;
  • Structural integrity: Proper layering according to the “thick over lean” principle helps maintain the structural integrity of the painting. Thick layers on top of thin layers create a stable and consistent color film. This is especially important when using traditional glaze techniques or when painting in several sessions over a long period of time;
  • Visual Effects and Saturation: By using thin layers as a base and building up thick layers, painters can achieve a variety of visual effects. Bold layers provide depth, texture, and saturation to the artwork. The thicker consistency of bold paints allows for impasto techniques and exciting brush strokes or palette knife textures.

Ultimately, following the “bold paints are better than lean” rule ensures that your oil painting will age gracefully, maintaining its visual appeal and structural integrity over time. This minimizes the risk of cracking, delamination, or other problems that can compromise the quality and longevity of the artwork.

It is important to note that although the “fat over lean” rule is a common practice, individual artists may adapt it to suit their specific technique or artistic vision. However, understanding this principle and its benefits is essential for any oil painting artist to make informed decisions and create works of art that will stand the test of time.

How to layer your painting using the fat-over-lean rule

The Fat Over Lean Rule in Oil Painting

Applying layers of paint using the ” fat over fat” rule involves a systematic approach to ensure the proper application of layers of fat a paint. Here’s a step-by-step guide to help you navigate the process:

  • Start with a lean undercoat: Start your painting with a thin coat or undercoat. This initial coat should have less oil and a higher proportion of solvent. Dilute the oil paint with a solvent such as mineral spirits or turpentine to get a more fluid consistency. This thin layer creates the base and composition of your artwork;
  • Gradually increase the oil content: As you progress to subsequent coats, increase the oil content of the paint mixture to create bold layers. Add drying oils, such as linseed oil or poppy seed oil, to the paint to make it richer and thicker. This gradual increase in oil content ensures that each coat is thicker than the previous one;
  • Allow plenty of time to dry: It is very important to let each coat dry thoroughly before applying the next. This is especially important when going from lean to oily coats. Waiting until the previous coat has dried to the touch helps keep the overall painting stable and minimizes the risk of cracking or adhesion problems;
  • Consider quick-drying products: If you prefer to work faster or have a busy schedule, you can include quick-drying mediums in your fat coats. Such mediums, such as alkyds, help speed up the drying process while maintaining the “fat over lean” principle. Follow the manufacturer’s instructions when using such media;
  • Observe consistency when applying fat coats: As fat coats progress, try to maintain a constant oil content in these coats. Consistent oil content ensures even drying and helps maintain overall picture stability. Avoid using very fat mixes in one layer and much more liquid ones in the next;
  • Adjust media and solvents: During the layering process, media and solvents may need to be adjusted to achieve the desired consistency and workability. Mediums can increase the oiliness of the paint and solvents can decrease it. Experiment and find the right balance for your particular painting technique and style.

Remember to always remember the “fat over lean” principle and its importance in maintaining the longevity and integrity of your work. This is a guide that should be adapted to your personal preference and technique. Understanding the materials you are working with and their properties is the key to successfully applying the fat-over-lean rule.

What happens if you don’t follow the fat-over-lean rule?

If you don’t follow the “fat over lean” rule in oil painting, it can lead to a number of problems that can affect the stability and longevity of your artwork. Here are some of the consequences that can occur if you don’t follow this rule:

  • Adhesion problems: Neglecting the ” fat-over-lean” principle can lead to poor adhesion between layers of paint and support (canvas or panel). This can cause the top coats to eventually begin to peel, crack or peel off, causing your artwork to deteriorate;
  • Cracking: Applying thick coats directly on thin coats without enough time to dry can lead to cracking. Underlying lean coats may dry faster and shrink in size, while fatty coats, which dry slower, remain flexible. This discrepancy in drying rate and flexibility can cause stress and eventually lead to cracking of the paint film;
  • Drying problems: Failure to follow the ” fat-over-lean” rule can result in uneven drying of all coats. If fat coats are applied too early or lean coats are skipped, the layers underneath may not have time to dry properly. This can lead to solvent or moisture retention, causing potential problems such as blooming, yellowing, or even mold growth;
  • Lack of flexibility: Without a gradual increase in oil content from thin to thick layers, the paint film may not have the necessary flexibility to adjust to the natural expansion and contraction that occurs with changes in temperature and humidity. This stiffness can stress the paint film, increasing the risk of cracking or delamination;
  • Long-Term Stability: The ” fat-over-lean” rule is critical to maintaining the long-term stability of your artwork. By layering correctly, you create a structurally sound painting that can stand the test of time. Ignoring this rule can compromise the overall stability and integrity of your artwork, which can cause it to deteriorate or deteriorate over the years.

It is important to note that while the “fat-over-lean” rule is common practice, some artists may deliberately deviate from it to achieve certain effects or to experiment with alternative techniques. However, understanding the possible consequences and making informed decisions are very important for the longevity and preservation of your artwork.

Conclusion

By following the “fat-over-lean” rule, you can ensure that your oil paintings have a solid base, exhibit proper adhesion, remain flexible, and have every chance of remaining intact and visually appealing for years to come.

Share

By

Mastering the Art of Painting with a Limited Palette

Posted on 15 min read 55 views

When it comes to selecting colors for your limited palette, the possibilities are abundant. Your choice of colors will be influenced by the desired effect you wish to create, the subject matter of your artwork, and the medium you’re working with.

Utilizing a small yet diverse range of pigments in your paintings can offer numerous advantages to your artistic practice. By employing a limited palette, your artwork can exhibit a sense of organization and harmony that captivates the viewer.

Regardless of whether you work with oil painting, acrylics, watercolors, or any other medium, a limited palette allows you to skillfully mix a wide array of values and tones, unlocking endless possibilities for creative expression.

Unlocking the Power of a Limited Palette in Painting

Painting with a limited palette involves carefully selecting a minimal number of paint tubes to achieve a broad range of tones across the spectrum. It also entails choosing a precise quantity of pigments necessary to create colors that align with your artistic vision.

Typically, a limited palette consists of no more than six different colors, excluding white for tints and black or burnt umber for shades.

The specific pigments you choose for your palette will depend on the desired outcome of your artwork. For instance, if you aim to create muted tones with intense color contrasts, ideal for portraiture, the Anders Zorn palette featuring yellow ochre, blue-black, and light red could be an excellent choice.

Understanding the Significance of Primary Colors in Painting

paints on a palette, painting picture

In the realm of painting, the primary colors hold a crucial role. These pigments, in their purest form, consist of blue, red, and yellow, specifically known as cyan, magenta, and yellow.

However, relying solely on these three primaries limits the range of colors (gamut) that can be achieved. Many vibrant and deep hues remain outside the mixing capabilities of these pigments.

To overcome this limitation, many artists adopt a limited palette approach. They start with the primary colors and then expand their palette by incorporating additional colors that cannot be obtained through primary mixing alone, such as crimson.

In a six-color limited palette, each primary color is represented in both its warm and cool variations. This includes a warm blue leaning towards red, a cool blue leaning towards yellow, a cool red leaning towards blue, a warm red leaning towards yellow, a warm yellow leaning towards red, and a cool yellow leaning towards blue. By employing six pigments, artists utilize the fewest colors possible to create a broad range of hues. This enables them to achieve superior color contrasts compared to using fewer than six colors.

In this guide, all the listed palettes feature a dominant hue of a primary color, be it blue, red, or yellow. This selection facilitates the creation of contrasts in hue, shade, and temperature. For instance, the Anders Zorn palette consists of vermilion (red hue), ivory black (blue hue), and yellow ochre (yellow hue).

Benefits of a Limited Primary Color Palette

When aiming for realism in your artwork, opting for the six-color limited palette can prove highly advantageous. It offers a versatile range of colors that enable you to capture lifelike representations effectively. Additionally, this palette suits artists who enjoy experimenting with vibrant color variations and wish to avoid any constraints on their creative choices.

However, many artists prefer a more reductive approach, working with a smaller and more restricted color wheel. This allows them to focus on conveying mood and emotion rather than striving for realistic color representation. By utilizing alternative limited color palettes, artists can harmonize different areas of their artwork that might otherwise appear disjointed.

Regardless of the chosen palette, warm and cool tones are essential to create contrast in your painting. While the colors may not precisely match the real-life appearance of the subject, they can still evoke a similar impact. Instead, artists rely on value, the lightness or darkness of a color, to emphasize the structure and form of their artwork. This approach offers the freedom to be creative with the palette choice while maintaining the definition and visual impact of the subject.

Advantages of a Limited Palette in Painting

Discover the compelling reasons to embrace a limited palette in your artistic endeavors:

  • Create Harmonious Color Combinations:

Using a limited palette allows you to produce stunningly harmonious paintings. With fewer pigments at play, the colors seamlessly blend together, forming a visually cohesive composition. By employing contrasting colors on your palette, you can even neutralize disparate sections, establishing a strong visual relationship throughout your artwork. The limited palette encourages the exploration of subtle color graduations and nuanced variations.

  • Cut Art Supply Costs:

One practical benefit of working with fewer paints is the cost-saving advantage. With a limited palette, you not only spend less on art supplies but also require less space to store your tubes. If you aspire to paint in plein air or venture outdoors, the compact nature of a limited palette makes it more convenient to carry in your bag.

  • Improve Color Mixing Skills:

Using a limited palette enhances your ability to mix colors effectively. With a restricted set of pigments, you embark on a valuable training exercise, deepening your understanding of color theory and the relationships between different hues and values. By manually mixing various tones and hues, you gain insight into composition planning and meticulous consideration of each tone and value transition. This approach empowers you to create custom colors instead of settling for pre-manufactured tubes, further honing your color-matching skills. Moreover, the act of manually mixing colors transforms your perception of the world around you, heightening your sensitivity to the nuances of color.

  • Personalize Your Palette:

An artist’s palette is a personal reflection of their practice and style. Experienced artists often begin with a standard limited palette to learn the art of color mixing and subsequently tailor their palette to suit their unique preferences. As your skills develop, you can explore different color options and modify your palette accordingly, establishing a signature set of colors that resonate with your artistic vision.

Examples of Limited Palettes

The selection of colors for a limited palette can vary depending on your chosen medium, subject, and desired effect. However, there are a few key colors that are commonly used across different palettes. Additionally, the addition of white and burnt umber or black is crucial for creating a range of values. Here are some essential colors to consider:

paints on the table, palette knife
  • Titanium White or Zinc White:

Titanium white is opaque and possesses strong covering power. It is excellent for creating highlights with significant impact. Zinc white, on the other hand, is translucent and less likely to make colors appear “chalky” when used on its own. Combining the two can result in more balanced highlights.

  • Burnt Umber:

Burnt umber is often preferred over ivory black by many artists. This earth pigment has reddish and yellow undertones and can be mixed with ultramarine blue to create a deep, intense black. It is useful for creating warm or cool shadows by adjusting the ratio of burnt umber or ultramarine blue. Additionally, burnt umber offers more transparency, making it suitable for creating transparent and fast-drying shadows as part of the initial paint layer.

  • Ivory Black:

Ivory black is commonly used in palettes like the Anders Zorn palette or cool monochromatic palettes. It has cool, bluish undertones and serves as a solid, cool black. However, modifying the color profile of ivory black without darkening it can be challenging. In contrast, burnt umber allows for more flexibility in modification. While ivory black is suitable for cool blacks or as a neutral blue in certain palettes, it can sometimes make colors appear dull compared to burnt umber.

Exploring the Split Primary Limited Palette in Oil Paint

One of the most widely used limited palettes in oil painting is the split primary palette. It offers a broad range of hues and allows for high chroma and vibrant color contrasts. This palette involves using both warm and cool versions of each primary color. Here are the key colors typically included in this palette:

  • Quinacridone Magenta (PV19):

This primary magenta color is cool in form but can be mixed to create vibrant oranges. It adds depth and intensity to your paintings, especially when combined with other colors.

  • Cadmium Red Light (PR108):

This deep red leans towards yellow and has a more rounded quality in mixtures. It can be substituted with Pyrrole red if desired. Cadmium Red Light is excellent for creating warm tones and is a versatile color for a wide range of subjects.

  • Phthalo Blue (PB15):

As a primary cyan color, Phthalo Blue mixes to produce vibrant greens. It is highly intense and can add richness to your paintings. This color provides a cool tone and is essential for achieving a balanced color range.

  • Ultramarine Blue (PB29):

Ultramarine Blue is a blue pigment that leans towards violet. It is a versatile color with a rich depth, ideal for creating a wide range of cool tones and subtle variations.

  • Transparent Yellow (PY128):

Transparent Yellow serves as the primary yellow in this split primary palette. It offers transparency and can be used to create bright, luminous colors when mixed with other pigments. This color is particularly useful for glazing techniques.

  • Cadmium Yellow (PY35) or Hansa Yellow:

Cadmium Yellow is a deep, rounded yellow that provides warmth and richness. Alternatively, you can substitute it with Hansa Yellow from M. Graham. Both options work well in achieving a wide range of warm tones and mixing vibrant yellows.

Painting with a Three-Color Oil Palette: Tips and Techniques

When it comes to painting with a limited palette of three colors in oil, it’s important to acknowledge that the concept of using only true primary colors is not flawless. While there are no pigments that perfectly align with the primary colors on the color wheel, it doesn’t mean we can’t create beautiful artwork using this approach.

One thing to keep in mind when working with just three colors is that you may not be able to mix them to achieve every color imaginable. Certain shades, such as vibrant oranges and purples, might not appear as saturated as you desire. However, there are pigment combinations that come close to replicating these hues.

Another drawback of the three-color palette is the need for extensive mixing to achieve specific colors. This means you’ll have to experiment and blend the colors together to achieve the desired shades and tones.

However, the key to choosing a limited palette for your painting practice is not solely focused on using colors that resemble true primary colors. Instead, it’s about finding colors that best suit your artistic vision and the outcome you wish to achieve. Different combinations of primary colors can yield equally captivating results, regardless of their proximity to true primaries. So, prioritize what will make your painting impactful rather than fixating on the colors that are closest to being primary.

It’s worth noting that the primary triad palette typically produces high-chroma colors. If you’re seeking a palette with more harmonious colors, you may want to explore the landscape or portrait sections, as they offer alternative color combinations that can achieve the desired effect.

The Primary Triad Palette

  • Transparent Yellow PY128:

When mixed with reds or blues, this transparent yellow pigment produces a vibrant mid-yellow shade. It excels in creating clean color mixes and lives up to its name by maintaining its transparent properties.

  • Quinacridone Magenta PV19:

Considered the primary red color in this palette, quinacridone magenta is an incredibly versatile pigment. It has the ability to produce vibrant oranges and equally captivating purples. In its pure form, it leans towards the blue side of the color spectrum. Additionally, when applied as a glaze over white, it can create vivid pinks.

  • Phthalo Blue (primary cyan) PB15:

Known for its high covering power, phthalo blue takes on the role of the primary cyan in this palette. It is a mid-value blue that adds depth and richness to your artwork.

A Study in Warm and Cool Pigments

Prepare to be amazed by the remarkable versatility of a specific palette consisting of one warm and one cool color. Both pigments exhibit a dark appearance in their purest forms, yet possess the desirable quality of transparency.

With this palette, you have the power to create rich values and achieve tonal variations that beautifully simulate color and depth in your artwork.

While the possibilities are endless when it comes to selecting cool and warm pigments, there are three recommended palettes that consistently yield impressive results:

  • Palette 1:
    • Burnt sienna;
    • Ultramarine;
    • White.
  • Palette 2:
    • Burnt Umber;
    • Ultramarine;
    • White.
  • Palette 3:
    • Viridian Green;
    • Alizarin Crimson;
    • White.

World of Monochromatic Painting

Delve into the realm of monochromatic art with a limited palette consisting of burnt umber, ultramarine, and white. By utilizing these three colors, you can achieve stunning monochromatic effects in your artwork.

When working with a monochromatic palette, you have the flexibility to select any single pigment and pair it with black or burnt umber to create a wide range of values. This allows for a diverse tonal spectrum in your paintings.

Limited Palette for Portrait Painting

Creating lifelike skin tones in portrait painting can be challenging, especially for beginners who often struggle with oversaturated tones. As a helpful tip, it’s advisable to make the tones much duller than initially anticipated.

Inexperienced painters may attempt to use vibrant red pigments directly on cheeks or lips, resulting in an artificial appearance. To achieve softer and more natural skin tones, a specific palette can be employed as a solid foundation, with darker neutrals used to tone down the colors.

For portrait painting, a muted color palette works best. By incorporating a muted red, muted yellow, and two additional pigments to balance and soften the colors, remarkable results can be achieved.

Portrait Palette:

  • Yellow Ochre:

Yellow ochre, when mixed with titanium white and cadmium red, serves as an excellent base tone for skin.

  • Raw Umber:

With its blue-yellow undertones, raw umber can be utilized to cool down the mixture and add depth to shadows in the artwork.

  • Cadmium Red:

This pigment can be mixed with titanium white and other neutralizing colors to create highlights and accents.

  • Ivory Black:

By mixing ivory black with titanium white, a neutral blue shade can be achieved. This combination is ideal for neutralizing tones in lips and other vibrant areas of the skin.

Alternatively, an alternative palette can be employed to create a softer effect using muted colors:

  • Naples Yellow:

A warm and intense yellow pigment that surpasses the earthy tones of yellow ochre.

  • Vermilion:

A vibrant orange-red hue, perfect for capturing lip colors. It can also be added to brown tones to introduce warmth.

  • Titanium White:

The reliable and versatile white pigment complements the muted color palette.

The Unique Palette of Anders Zorn

Renowned Swedish artist Anders Zorn was known for his exceptional ability to create vibrant and pure color mixes with a remarkably limited palette. Despite his palette lacking vivid hues, Zorn achieved remarkable results by carefully selecting just a few colors. His palette consisted of:

  • Yellow Ochre;
  • Ivory Black;
  • Vermilion;
  • Titanium White.

Zorn’s palette choice is evident in his famous paintings, where he skillfully demonstrates the power of these selected colors.

Limited Palette for Seascape Paintings

As an artist who primarily focuses on seascapes, I often opt for the primary triad palette. However, there are instances where I incorporate Cobalt Blue for the sky or utilize Ultramarine to achieve more intense violet-blues. You can explore some of my seascape paintings for reference.

For those interested in an alternative seascape palette, consider the following:

  • Transparent Yellow

This primary yellow pigment mixes harmoniously with cyan, allowing for the creation of captivating turquoises and teals.

  • Cadmium Yellow Light

With color coordinates leaning towards green, this variation of cadmium yellow is perfect for achieving sharp and clear greens when combined with the blues in this palette.

  • Alizarin Crimson

When mixed with blues, this color produces exquisite violet blues and violet blue-greys, making it an excellent choice for sunset sea paintings.

  • Cadmium Red Light

Mixing this pigment with yellow results in a muted orange shade that effectively neutralizes blues, thus creating a blue-grey palette.

  • Phthalo Blue

Arguably the most crucial color for seascapes, Phthalo Blue will be your go-to hue for various elements in your artwork.

  • Ultramarine Blue

By closely observing the sea, you’ll notice that light often plays upon it, imbuing it with purple undertones, particularly in deeper waters.

  • Ivory Black

In comparison to burnt umber, Ivory Black proves more effective when mixed with and darkening blues. Additionally, it helps in creating a range of muted blues.

Unleashing the Beauty of Limited Palettes in Landscape Painting

When it comes to landscape painting, your palette selection will depend on the specific landscapes and seasons you wish to capture. If you find yourself immersed in plein air painting during the summer, it’s essential to have colors that allow you to depict a variety of vibrant greens and bright flowers. In landscape painting, black is generally unnecessary, but burnt umber can help you achieve muted and earthy tones. Here, we present a limited palette tailored for landscapes:

  • Cadmium Yellow:

This slightly warm pigment exhibits a medium value akin to the color of butter. It works wonders for portraying summer flowers, fields of hay, and generating a sense of warmth in your artwork.

  • Transparent Yellow:

Use this color to create a multitude of shades in foliage. With its transparency, it delivers a clean and vibrant masstone, as well as brightness in tint.

  • Cadmium Red:

Reserved for warm sunsets and vibrant flowers, red is not a critical color in landscape painting. However, you can substitute other reds like Quinacridone Magenta or Vermilion if needed.

  • Alizarin Crimson:

As a transparent red that leans towards the blue spectrum, Alizarin Crimson is particularly effective in neutralizing greens in foliage or enhancing shadows in your landscape compositions.

  • Cobalt:

This slightly cool blue is an excellent choice for capturing skies, snow scenes, and lakes with its subtle brilliance.

  • Ultramarine:

With its warm undertones, Ultramarine is ideal for creating dark and greyish-green shades. It also lends itself well to deep lake scenes or intensely blue skies.

For those seeking additional options to facilitate mixing greens and deep earthy reds in their landscape paintings, consider these optional extras:

  • Burnt Sienna:

A staple for desert painters, Burnt Sienna works wonderfully in autumn scenes, forestry, and can even serve as an imprimatura for various subjects. It’s an incredibly vibrant earth pigment that can also serve as a substitute for red.

  • Sap Green:

This deep, earthy, and mossy transparent green leans towards yellow. While you can mix this color using your base palette, having a premixed tube of Sap Green can prove helpful during your painting process.

  • Yellow Ochre:

This beautiful pigment shines in golden sunsets and autumn landscapes, adding a touch of warmth to your compositions.

The Power of Limited Palettes in Landscape Painting

In this captivating gouache landscape painting, I ventured into the realm of limited palettes, utilizing just five colors in addition to ivory black, and white. To bring to life the golden grasses, rocky mountains, lush green bushes, and vibrant blue sky, I employed yellow ochre, viridian green, burnt umber, ultramarine, and cyan (alongside ivory black and titanium white). These colors are readily available in the Winsor & Newton gouache introductory set, but to fully embrace this palette, it is recommended to add individual tubes of titanium white and burnt umber. In the accompanying video tutorial, I delve into the various color-mixing techniques employed during the process.

Inspired by Monet’s Impressionist Palette

Claude Monet’s artwork is renowned for its brilliant colors and luminosity. He had a remarkable ability to perceive the subtle tones within the interplay of light and shadows in a landscape, which he then emphasized through vibrant color mixes. Monet’s achievement of vibrant hues can largely be attributed to his preference for a limited palette, allowing him to mix the fewest pigments together to achieve specific tones.

Monet’s palette typically included:

  • Cadmium Yellow Light (cool);
  • Cadmium Yellow Medium (warm);
  • Alizarin Crimson (cool and transparent);
  • Cadmium Red Light (warm);
  • French Ultramarine (cool);
  • Flake White.

Furthermore, it is suggested in James Heard’s book “Paint Like Monet” that Monet might have incorporated secondary green pigments, such as Viridian, to facilitate the mixing process in certain landscape pieces.

Exploring the Special Qualities of Extra Pigments

Certain pigments possess unique qualities that allow artists to achieve effects that cannot be easily replicated by mixing colors. In the context of a warm and cool palette consisting of six colors, you might find yourself lacking a suitable transparent deep red for glazing purposes. In such cases, incorporating a pigment like alizarin crimson can provide the desired effect.

The transparency, drying time, and even the binder used in pigments can significantly influence their usability and desirability in different artistic applications.

While many artists have gained fame for their mastery of limited palettes, such as Anders Zorn, it is important to recognize that their artistic practice was not always confined to such restrictions.

Evidence suggests that Zorn, as reported by the Museum Director of the Zorn Collection in Mora, Sweden, utilized a diverse range of colors throughout his painting career. Tubes of cobalt blue were discovered in his studio, and in certain paintings, it is evident that he employed a mixture of different blues and greens.

Therefore, while Zorn may have adhered to his limited palette for certain works, he also ventured beyond those boundaries on occasion.

Ultimately, the key is to experiment and discover what works best for your artistic practice, embracing the opportunity for exploration and, above all, enjoying the creative process.

FAQ

What does a limited palette mean?

A limited palette refers to using a restricted number of colors in a painting, typically fewer than the complete range of available pigments.

What is a limited palette called?

A limited palette is often called a “restricted palette” or a “reduced palette”.

What is limited color palette technique?

The limited color palette technique involves intentionally choosing a small number of colors to create a harmonious and cohesive visual effect in a painting.

What are the advantages of a limited color palette?

The advantages of a limited color palette include creating color harmony, simplifying color mixing, enhancing unity in a painting, and allowing artists to focus on value, composition, and other elements of their work.

Share

By

A Guide to the Best Fountain Pens for Drawing

Posted on 6 min read 59 views

The world of art is filled with a myriad of materials and mediums, from oil paints to digital tools. Amid this diverse palette, an unlikely hero emerges – the fountain pen. Not typically perceived as an instrument for creating masterpieces, it nonetheless holds a distinctive position due to its unique characteristics.

The fountain pen, with its capability to produce intricate details and fluid lines, serves as a crucial tool for many artists. Its classical charm adds an aesthetic appeal, making it more than just a writing instrument. For these artists, the fountain pen isn’t merely a tool, but a staple, enriching their craft and defining their style.

Pilot Falcon

AttributeOptions
PriceHigh
NibSoft Extra Fine, Soft Fine, Soft Medium, Soft Broad
Ink SystemCartridge, Converter

The Pilot Falcon, known for its semi-flexible gold nib, comes in several variations that artists will find intriguing. The nib has a unique feature – it offers a softness that allows the tines to spread slightly under pressure, creating line variation and enhancing the depth and texture of your drawings. This pen is excellent for expressive sketching and detailing.

Its rhodium-plated nib, in addition to providing an aesthetically pleasing contrast to its black body, offers a smooth writing experience that extends to drawing. The resin body is lightweight and comfortable to hold, making it a suitable choice for lengthy drawing sessions.

LAMY Safari

AttributeOptions
PriceMedium
NibExtra Fine, Fine, Medium, Broad, Left-handed
Ink SystemCartridge, Converter

The LAMY Safari, constructed of sturdy ABS plastic, is renowned for its ergonomic grip section designed to promote proper holding technique. This is especially useful for artists who require stability and precision in their work.

The pen’s nib, available in various sizes, is easily interchangeable, allowing artists to switch between line widths conveniently. Its sturdy build and smooth ink flow make it an ideal companion for the artist who is on the go.

TWSBI ECO

AttributeOptions
PriceLow
NibExtra Fine, Fine, Medium, Broad, Stub 1.1
Ink SystemPiston Filler

The TWSBI ECO is a demonstration of beauty meeting functionality at an affordable price. This pen features a piston filler system, which is not commonly found in this price range. This system allows for a larger ink capacity, enabling prolonged drawing sessions without frequent refills.

Its transparent body provides a visually pleasing glimpse into the pen’s inner workings and offers a clear indication of when a refill is due. The stainless steel nib provides a reliably consistent ink flow, beneficial for maintaining continuity in your drawings.

Platinum #3776 Century

AttributeOptions
PriceHigh
NibUltra Extra Fine, Extra Fine, Fine, Medium, Broad, Coarse, Music
Ink SystemCartridge, Converter

The Platinum #3776 Century is a premium fountain pen that makes its mark with its “Slip and Seal” mechanism. This mechanism ensures the pen won’t dry out for up to two years, even when left unused. This feature is particularly helpful for artists who use their fountain pen sporadically.

The pen’s nib sizes range from Ultra Extra Fine to Coarse, offering a great deal of versatility in line widths. Particularly noteworthy is the Ultra Extra Fine nib, which allows for a level of detail not achievable with many other fountain pens.

Sailor 1911 Standard

AttributeOptions
PriceHigh
NibExtra Fine, Fine, Medium Fine, Medium, Broad, Zoom, Music
Ink SystemCartridge, Converter

Sailor, a respected name in the fountain pen industry, does not disappoint with the 1911 Standard. Its range of nib options – Extra Fine to Broad, along with Zoom and Music nibs – ensures a fit for every artist’s preference.

The Zoom nib is unique. When used at a higher angle, it gives a fine line suitable for detail work. As you lower the angle, the line becomes broader, allowing for effective shading or bold lines.

Choosing Your Fountain Pen Ink for Drawing

Close-up photo of a fountain pen focused on the tip

When it comes to drawing with fountain pens, selecting the right ink is crucial. Different inks offer a variety of properties that can greatly impact your drawing experience. From waterproofness to sheen and fade-resistance, understanding the characteristics of various inks will help you make an informed decision.

To assist you in your ink selection process, here are a few popular inks that many artists consider:

Sailor Kiwa-Guro

  • Smooth flow: Sailor Kiwa-Guro is highly regarded for its smooth flow, allowing for seamless drawing;
  • Waterproof: This ink is specifically known for its waterproof properties, ensuring that your artwork remains intact even when exposed to moisture.

Platinum Carbon Black

  • Deep black color: Platinum Carbon Black offers a rich and deep black color, providing a bold and dramatic effect to your drawings;
  • Permanence: This ink is renowned for its permanence, meaning it is resistant to fading over time, preserving the integrity of your artwork.

Diamine Ancient Copper

  • Color range and shading: Diamine Ancient Copper is a popular choice for artists due to its extensive range of color and shading possibilities. It offers a warm and inviting copper hue that can add depth and dimension to your drawings.

Remember, not all fountain pen inks are created equal. It’s crucial to ensure that the ink you choose is compatible with your specific fountain pen. Some inks may contain particles or components that could potentially clog the pen’s feed, leading to issues with ink flow and performance. Always verify that the ink you select is suitable for your particular pen to avoid any complications.

By considering the properties and characteristics of different fountain pen inks, you can find the perfect ink that aligns with your artistic vision and requirements. Experimenting with various inks will allow you to explore different effects and enhance your drawing experience with fountain pens.

Decoding Nib Types: A Detailed Look

Photo of a hand writing in a writing pad using a fountain pen

For many artists, the fountain pen’s allure lies in the nib – its heart, its soul. The nib determines the line width, the feel on paper, and the overall drawing experience.

Understanding the various nib types can guide artists in choosing the perfect pen:

  • Extra Fine/Fine (EF/F): These nibs provide thin lines, excellent for precision work or intricate detailing. However, they may offer a slightly scratchy feel due to the thinness of the tines;
  • Medium/Broad (M/B): These nibs provide wider lines and a smoother writing experience. They are great for larger illustrations or pieces that require bold lines and shading;
  • Stub/Italic (S/I): These nibs, cut straight across, offer unique line variation. Depending on the stroke direction, you can achieve thin or thick lines, adding character to your drawings;
  • Flex (F): Flex nibs can provide thin to broad lines within a single stroke, depending on the applied pressure. They add a certain dynamic expressiveness to sketches, although they may require a bit more practice to use effectively;
  • Zoom/Music (Z/M): These are special nibs that provide significant line variation based on the pen’s angle. They are versatile and can be used for both detailed and bold artwork.

Conclusion

The art world is as vast as it is diverse, offering an array of tools for artists to express their creativity. The fountain pen, while a more traditional choice, is rich with potential and versatility. With various nib options, ink types, and price ranges, there’s a fountain pen to suit every artist’s style and budget. As you embark on your artistic journey with fountain pens, remember to explore, experiment, and most importantly, enjoy the process. After all, the fountain pen is not merely a tool; it is an extension of the artist’s hand and a vehicle for bringing imagination to life.

FAQS

Which fountain pen is best for drawing?

The “best” fountain pen for drawing depends on your specific requirements, such as the level of detail in your drawings, your budget, and personal comfort. However, Pilot Falcon and LAMY Safari are two excellent options for their versatility and control.

Is fountain pen ink good for drawing?

Yes, fountain pen ink is great for drawing. It offers a range of color options and different properties such as permanence, shading, and sheening. However, it’s essential to ensure the ink is compatible with the fountain pen to prevent clogging or other damages.

What nib is best for drawing?

The choice of the nib depends on your drawing style. Extra fine or fine nibs are best for detailed work, while broad or stub nibs are great for bold lines and shading. Flex nibs allow varying line width in a single stroke, adding character and dynamism to your sketches.

What are the best fountain pen nibs for sketching?

For sketching, flex, stub, or music nibs are often preferred due to the varying line widths they provide. However, it ultimately comes down to the artist’s preference and style.

Share

By

Delving Deep into Warm Colors in the Canvas of Art

Posted on 8 min read 58 views

Art has perpetually served as a channel for individuals to express themselves, transforming the intangible into tangible creations. Among the fundamental elements that constitute art, color goes beyond being merely a visual attribute. It possesses the ability to communicate emotions, weave narratives, and breathe life into artistic endeavors. Amidst the vast array of shades and tones, warm colors hold a distinct significance owing to their innate capacity to evoke a diverse range of emotions. From providing solace and coziness to igniting passion and aggression, these hues wield a powerful influence. This comprehensive exploration delves deep into the role, comprehension, and application of warm colors within the realm of art.

Understanding Warm Colors

Warm colors are colors that, when visualized, evoke feelings of warmth, just like a sunny day or a cozy fireplace. They reside on one half of the color wheel and encompass hues from red through yellow, browns and tans included.

Color Wheel and Warm Colors

The color wheel is a fundamental tool used in the field of art and design to help understand the relationships between different colors. It consists of a circular diagram that organizes colors in a logical and visually appealing manner. The color wheel is divided into different sections, each representing specific color groups or categories.

Warm colors are a prominent category on the color wheel, and they evoke feelings of warmth, energy, and vibrancy. These colors are often associated with fire, sunlight, and heat. The warm colors on the color wheel include red, orange, and yellow. Additionally, there are some tertiary colors that also fall under the category of warm colors due to their composition.

To provide a clearer understanding, let’s explore the warm colors on the color wheel:

The color wheel is divided into several sections, including primary colors, secondary colors, and tertiary colors. Each section represents a specific set of colors. In the context of warm colors, the relevant sections are as follows:

ColorDescriptionPosition on Color Wheel
Primary Colors
RedA vibrant and intense color often associated with passion, love, and power.12 o’clock
YellowA bright and cheerful color symbolizing happiness, energy, and sunlight.4 o’clock
Secondary Colors
OrangeA warm and energetic color created by mixing red and yellow.Between red and yellow
Tertiary Colors
Red-VioletA tertiary color that combines red and violet hues.Between red and violet
Yellow-GreenAnother tertiary color formed by mixing yellow and green.Between yellow and green

Warm colors play a crucial role in art and design as they can create a sense of depth, energy, and excitement. They are often used to draw attention, convey strong emotions, or create a lively atmosphere. The positioning of warm colors on the color wheel helps artists and designers choose color combinations that harmonize well and create a visually appealing composition.

When using warm colors, it is essential to consider their effects on the overall design or artwork. They can be used to highlight specific elements, create focal points, or evoke specific moods. Combining warm colors with complementary cool colors can create a balanced and visually striking composition.

Warm Color Properties

Warm colors possess distinct properties that define their visual characteristics and emotional impact. Understanding these properties is essential for artists and designers to effectively utilize warm colors in their work. Here are some key properties of warm colors:

PropertyDescription
IntensityWarm colors are perceived as more intense compared to cool colors. They possess vibrancy and brightness that make them visually striking and captivating. The high intensity of warm colors allows them to grab attention and create a focal point within an artwork or design. Artists can utilize this property to draw the viewer’s gaze to specific areas or elements they want to emphasize.
Depth PerceptionWarm colors have the ability to create an illusion of depth in an artwork. When warm colors are used prominently or in the foreground of a composition, they tend to appear closer to the viewer. This visual effect enhances the three-dimensionality of an artwork, making it appear more dynamic and engaging. Artists can strategically place warm colors to manipulate the perception of depth and guide the viewer’s gaze within the composition.
Mood EvocationWarm colors have a powerful impact on evoking specific emotions and moods. They are often associated with warmth, comfort, passion, and joy. When used in a composition, warm colors can create a sense of energy and enthusiasm, making it feel lively and inviting. However, warm colors can also evoke more intense emotions like aggression or anger when used in certain contexts. Artists can carefully select warm colors to align with the desired mood or atmosphere of their artwork, effectively conveying the intended emotions to the viewer.

Incorporating warm colors into an artwork requires careful consideration of these properties. By understanding the intensity, depth perception, and mood-evoking capabilities of warm colors, artists can make deliberate choices that enhance the overall impact and visual storytelling of their creations.

To summarize, warm colors possess unique properties that distinguish them from cool colors. Their high intensity grabs attention, their placement can create depth perception, and their ability to evoke specific moods allows artists to convey various emotions. By harnessing these properties, artists can effectively employ warm colors in their work and create visually appealing and emotionally resonant compositions.

Application of Warm Colors in Art

Color wheel with warm tones on one side, with a picture of an erupting volcano

Warm colors play a significant role in the realm of art, offering artists a range of applications to convey emotions, highlight objects, or create a specific ambiance within their works. Here are several notable applications of warm colors in art:

  1. Creating a Sense of Warmth and Comfort: Warm colors are often employed to represent elements such as sunlight, fire, or warmth itself. By incorporating warm colors like shades of red, orange, and yellow, artists can evoke a feeling of coziness and comfort in their artworks. These colors can create an inviting atmosphere, making viewers feel a sense of warmth and familiarity;
  2. Evoking Emotions: One of the key strengths of warm colors lies in their ability to elicit specific emotions. Artists frequently harness the emotive capacity of warm colors to stimulate feelings of happiness, optimism, energy, and passion in their audience. The vibrant and lively nature of warm colors enables artists to imbue their artworks with a sense of vitality and enthusiasm;
  3. Highlighting Elements: Warm colors possess an inherent vibrancy and brightness, which makes them effective in drawing attention to specific elements within an artwork. By strategically utilizing warm colors, artists can emphasize particular objects or subjects, creating focal points that guide the viewer’s gaze. This technique allows for the selective highlighting of significant elements, enhancing their visual impact and importance in the composition;
  4. Creating Depth: The perception of warm colors as closer to the viewer can be leveraged to create a sense of depth and three-dimensionality in paintings. When warm colors are placed in the foreground or prominently featured in a composition, they appear to be closer, while cooler colors recede into the background. This visual effect enhances the illusion of depth, making the artwork feel more dynamic and immersive.

Warm colors find diverse applications in art. They can create a sense of warmth and comfort, evoke specific emotions, highlight elements, and contribute to the perception of depth within an artwork. By skillfully incorporating warm colors into their compositions, artists can effectively communicate their desired emotions and create visually engaging and impactful artworks.

Historical Use of Warm Colors in Art

Throughout different periods of art history, warm colors have been applied in unique and distinctive ways, contributing to the development and expression of artistic movements. Here are notable examples of the historical use of warm colors in art:

  • Renaissance: During the Renaissance, artists sought to imitate nature and create lifelike, naturalistic paintings. Warm hues were used extensively to achieve this goal. Artists such as Leonardo da Vinci employed warm colors in their chiaroscuro technique, which involved the dramatic use of light and shadow to create depth and three-dimensionality in their artworks. By skillfully manipulating warm colors, Renaissance artists were able to render the warmth and richness of human flesh, textiles, and other natural elements;
  • Impressionism: Impressionist artists, including Claude Monet and Pierre-Auguste Renoir, revolutionized the use of color in art. They extensively utilized warm colors to capture the changing effects of light and color in nature. Warm hues like vibrant oranges, yellows, and reds were employed to depict the warm sunlight, shimmering reflections, and the overall atmospheric ambiance in their outdoor landscapes. The application of warm colors in Impressionism contributed to the creation of vibrant and lively scenes that conveyed a sense of immediacy and captured fleeting moments;
  • Expressionism: In the Expressionist movement, artists aimed to convey intense emotions and subjective experiences. Warm colors played a significant role in communicating these emotional states. Artists like Edvard Munch, known for his iconic painting “The Scream,” utilized warm hues to heighten the sense of anxiety, terror, and emotional turmoil depicted in the artwork. The bold and intense application of warm colors, such as fiery reds and oranges, evoked a visceral response and intensified the emotional impact of the composition.

The historical use of warm colors in art demonstrates their versatility and power to evoke specific moods, create depth, and convey emotional intensity. From the naturalistic approach of the Renaissance to the expressive qualities of Impressionism and Expressionism, warm colors have played a vital role in shaping artistic movements and enriching the visual language of art.

Conclusion

Warm colors play an instrumental role in art, creating visceral responses, setting the tone, and crafting the visual narrative. Their ubiquitous presence across art history testifies to their enduring appeal and significance in the artist’s toolkit. By mastering the use of warm colors, artists can turn their canvases into a vibrant stage where colors perform a symphony of emotions and meanings, transforming their artworks into resonant pieces that connect with the viewers on a deeper level. Understanding the intricacies of warm colors paves the way for artistic innovation, pushing the boundaries of creativity and revealing the extraordinary power of color in art.

FAQS

What is a warm colors definition?

Warm colors are the colors that, when visualized, evoke feelings of warmth, like a sunny day or a cozy fireplace. They consist of hues from red through yellow, with browns and tans often being included.

What are warm and cool colors in art?

Warm colors range from red through yellow and include browns and tans, invoking feelings of warmth and comfort, while cool colors include hues from blue-green through blue-violet, often associated with calmness, tranquility, and space.

Understanding the distinct attributes and the emotive power of warm colors can enrich an artist’s practice, providing them with a broader palette of expressive possibilities. By harnessing their potential, artists can construct more impactful narratives, engage the viewer’s senses more profoundly, and bring their creative vision to life more effectively.

Share

By